Last Trip Down The Old Stairs
26 Monday Jan 2015
Posted in Home Improvement

26 Monday Jan 2015
Posted in Home Improvement
12 Friday Dec 2014
Posted in Home Improvement

Since we hung the drywall, our lighting has been… basic to say the least. Just your regular CFL bulbs in basic white ceramic fixtures. Upgrading them has been on our lists for years.
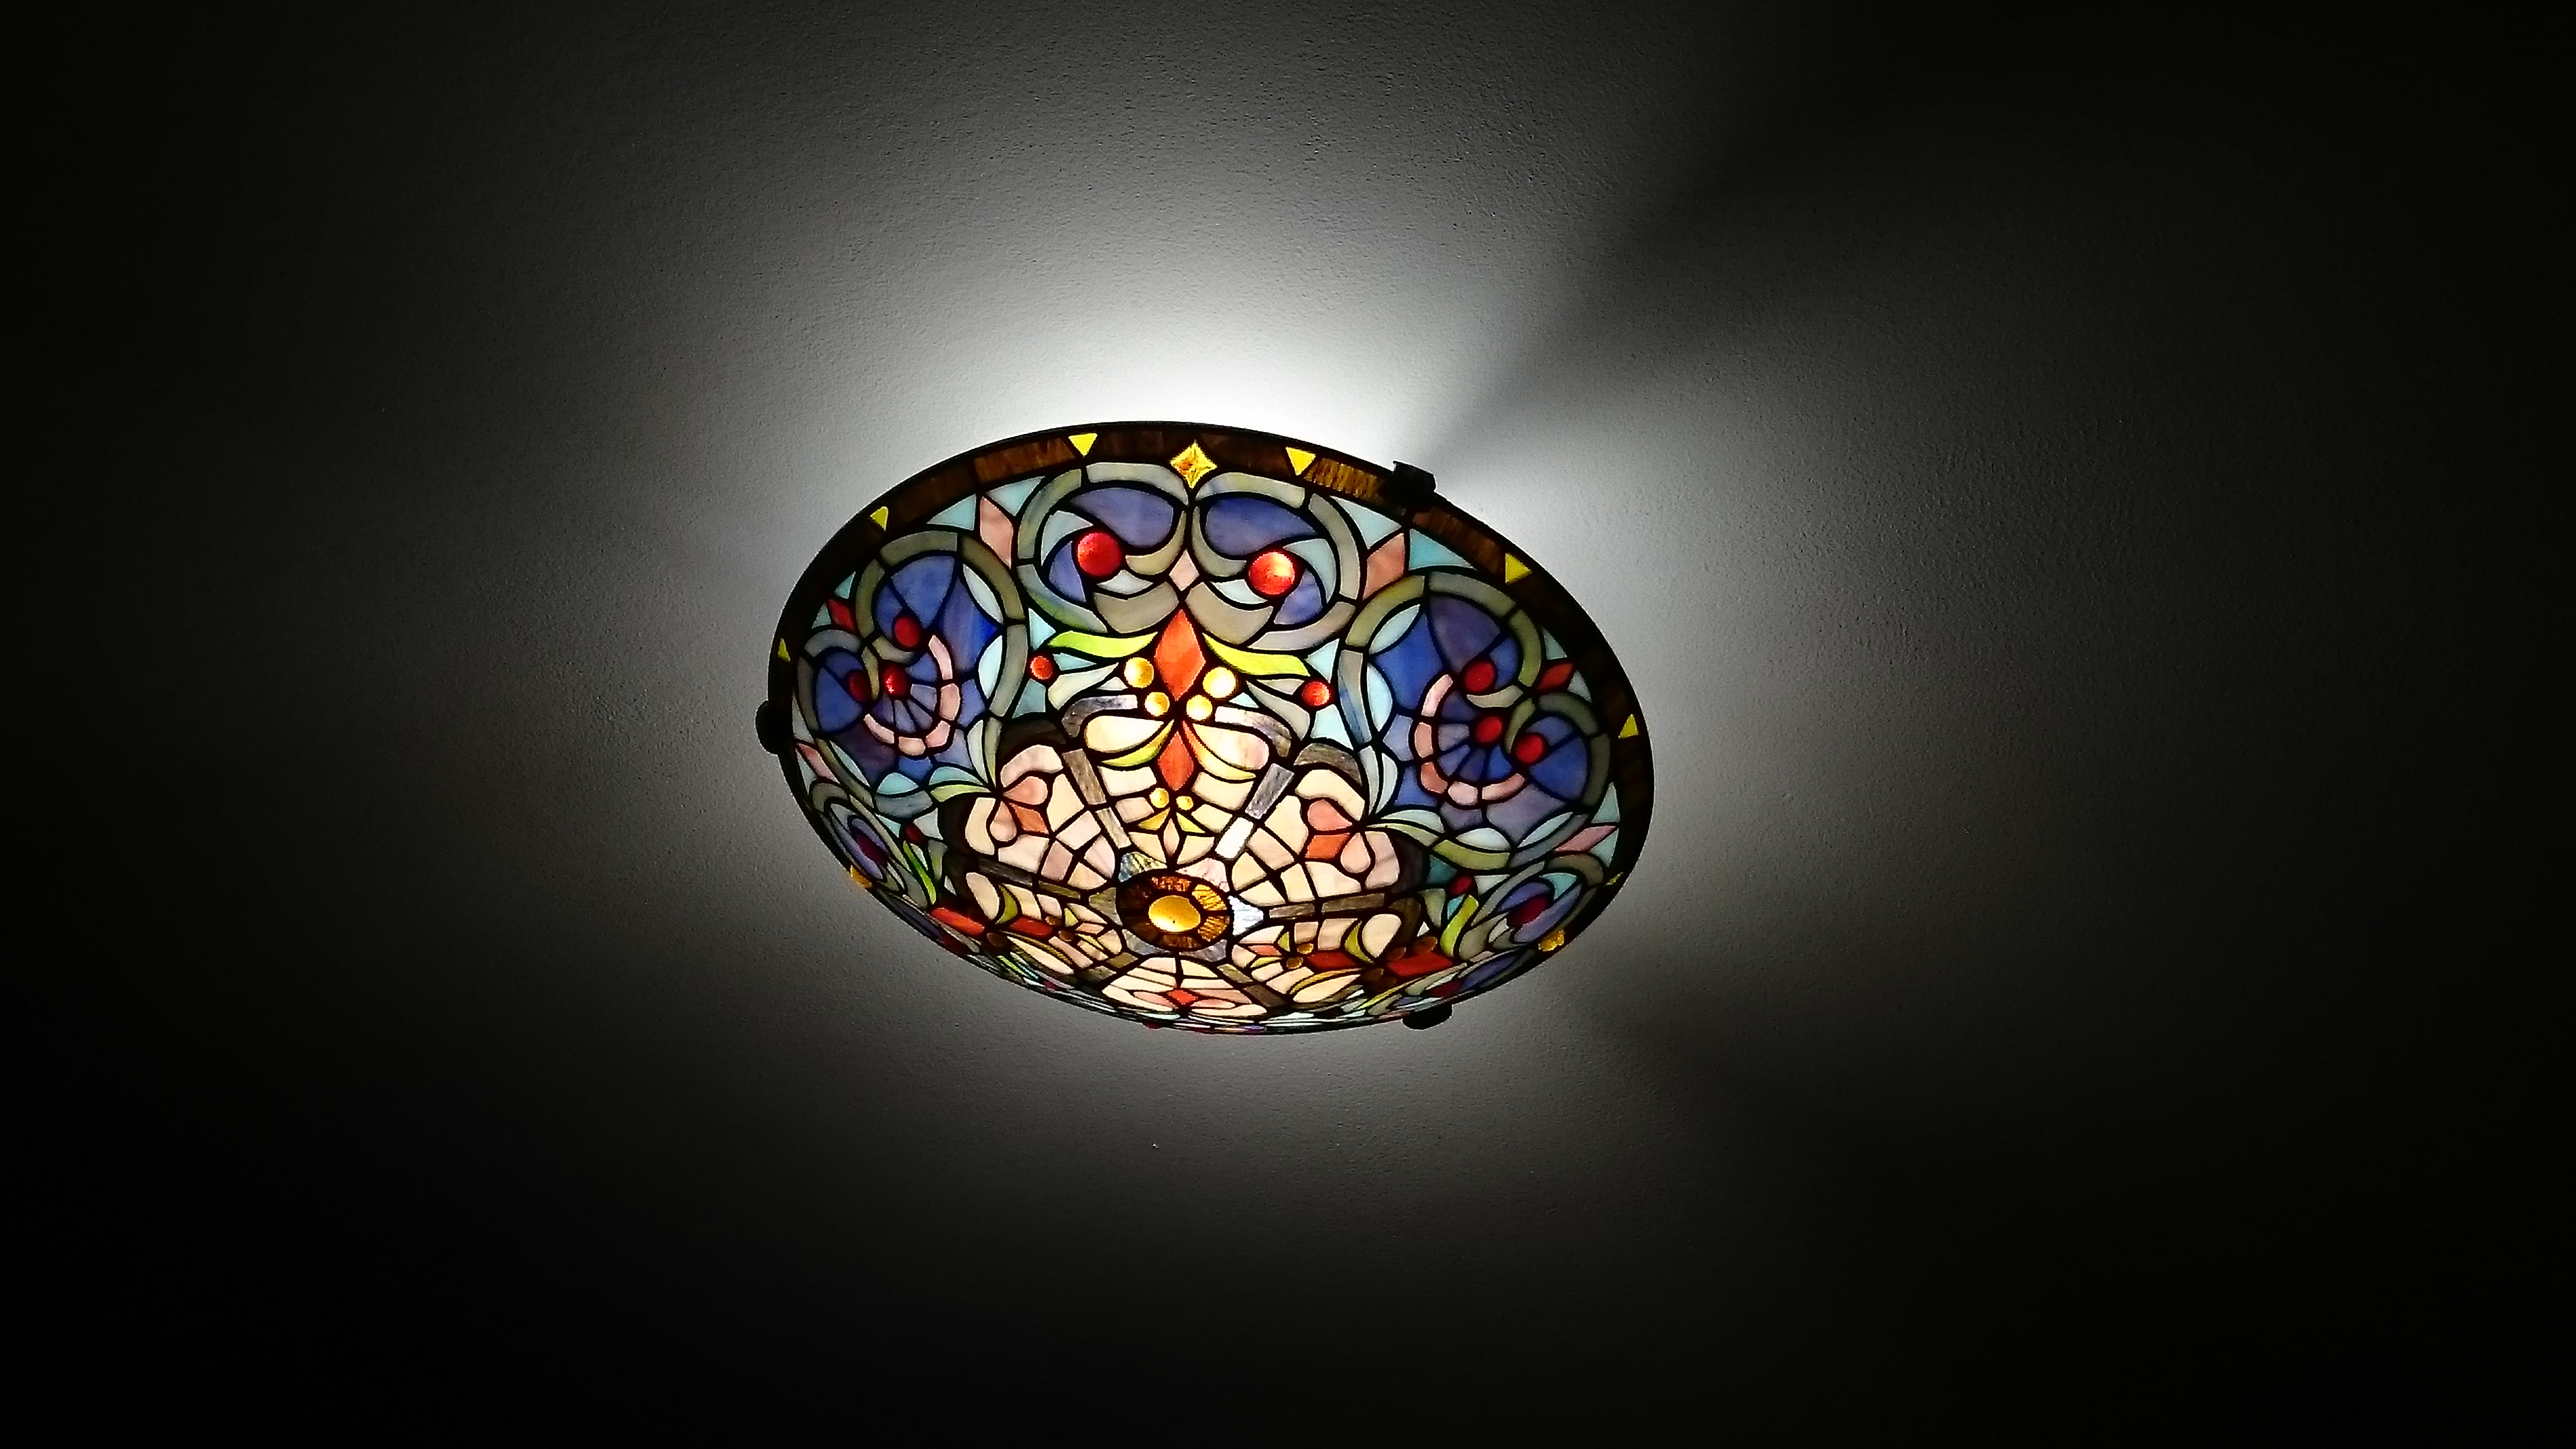
Finally this month we did it. The Living room got a Tiffany style stained glass fixture to match the other stained glass down there. We got this one on Amazon and it was a straight forward install. In addition to matching the windows, it has hearts all around it.
The kitchen got a a bespoke piece. Siri had the idea of using an antique copper colander as a shade if I could build the rest. Sure can! We ordered some braided wire, a cap for the ceiling and a copper socket. Took a little while to get the height right, but it really makes for a brighter work area on the table below. The little holes of the colander also make cool patterns on the ceiling. We’re still trying to think of a better bulb, preferably lower profile, maybe even a circular florescent tube.

The lamp makes some nice patterns of light on the ceiling.
The bedroom was last. We had somehow managed to not break one of the original light fixtures that was in the bedroom when we bought the house 2.5 years ago. These were some of the first parts to come down during demolition and they’ve been moved around the state of Maryland a few times since without breaking. The rugged thing had finally won us over. Its simple, has 2 sockets for bulbs and has a frosted glass cover with white paint on the inside with a pattern radiating out from the center.

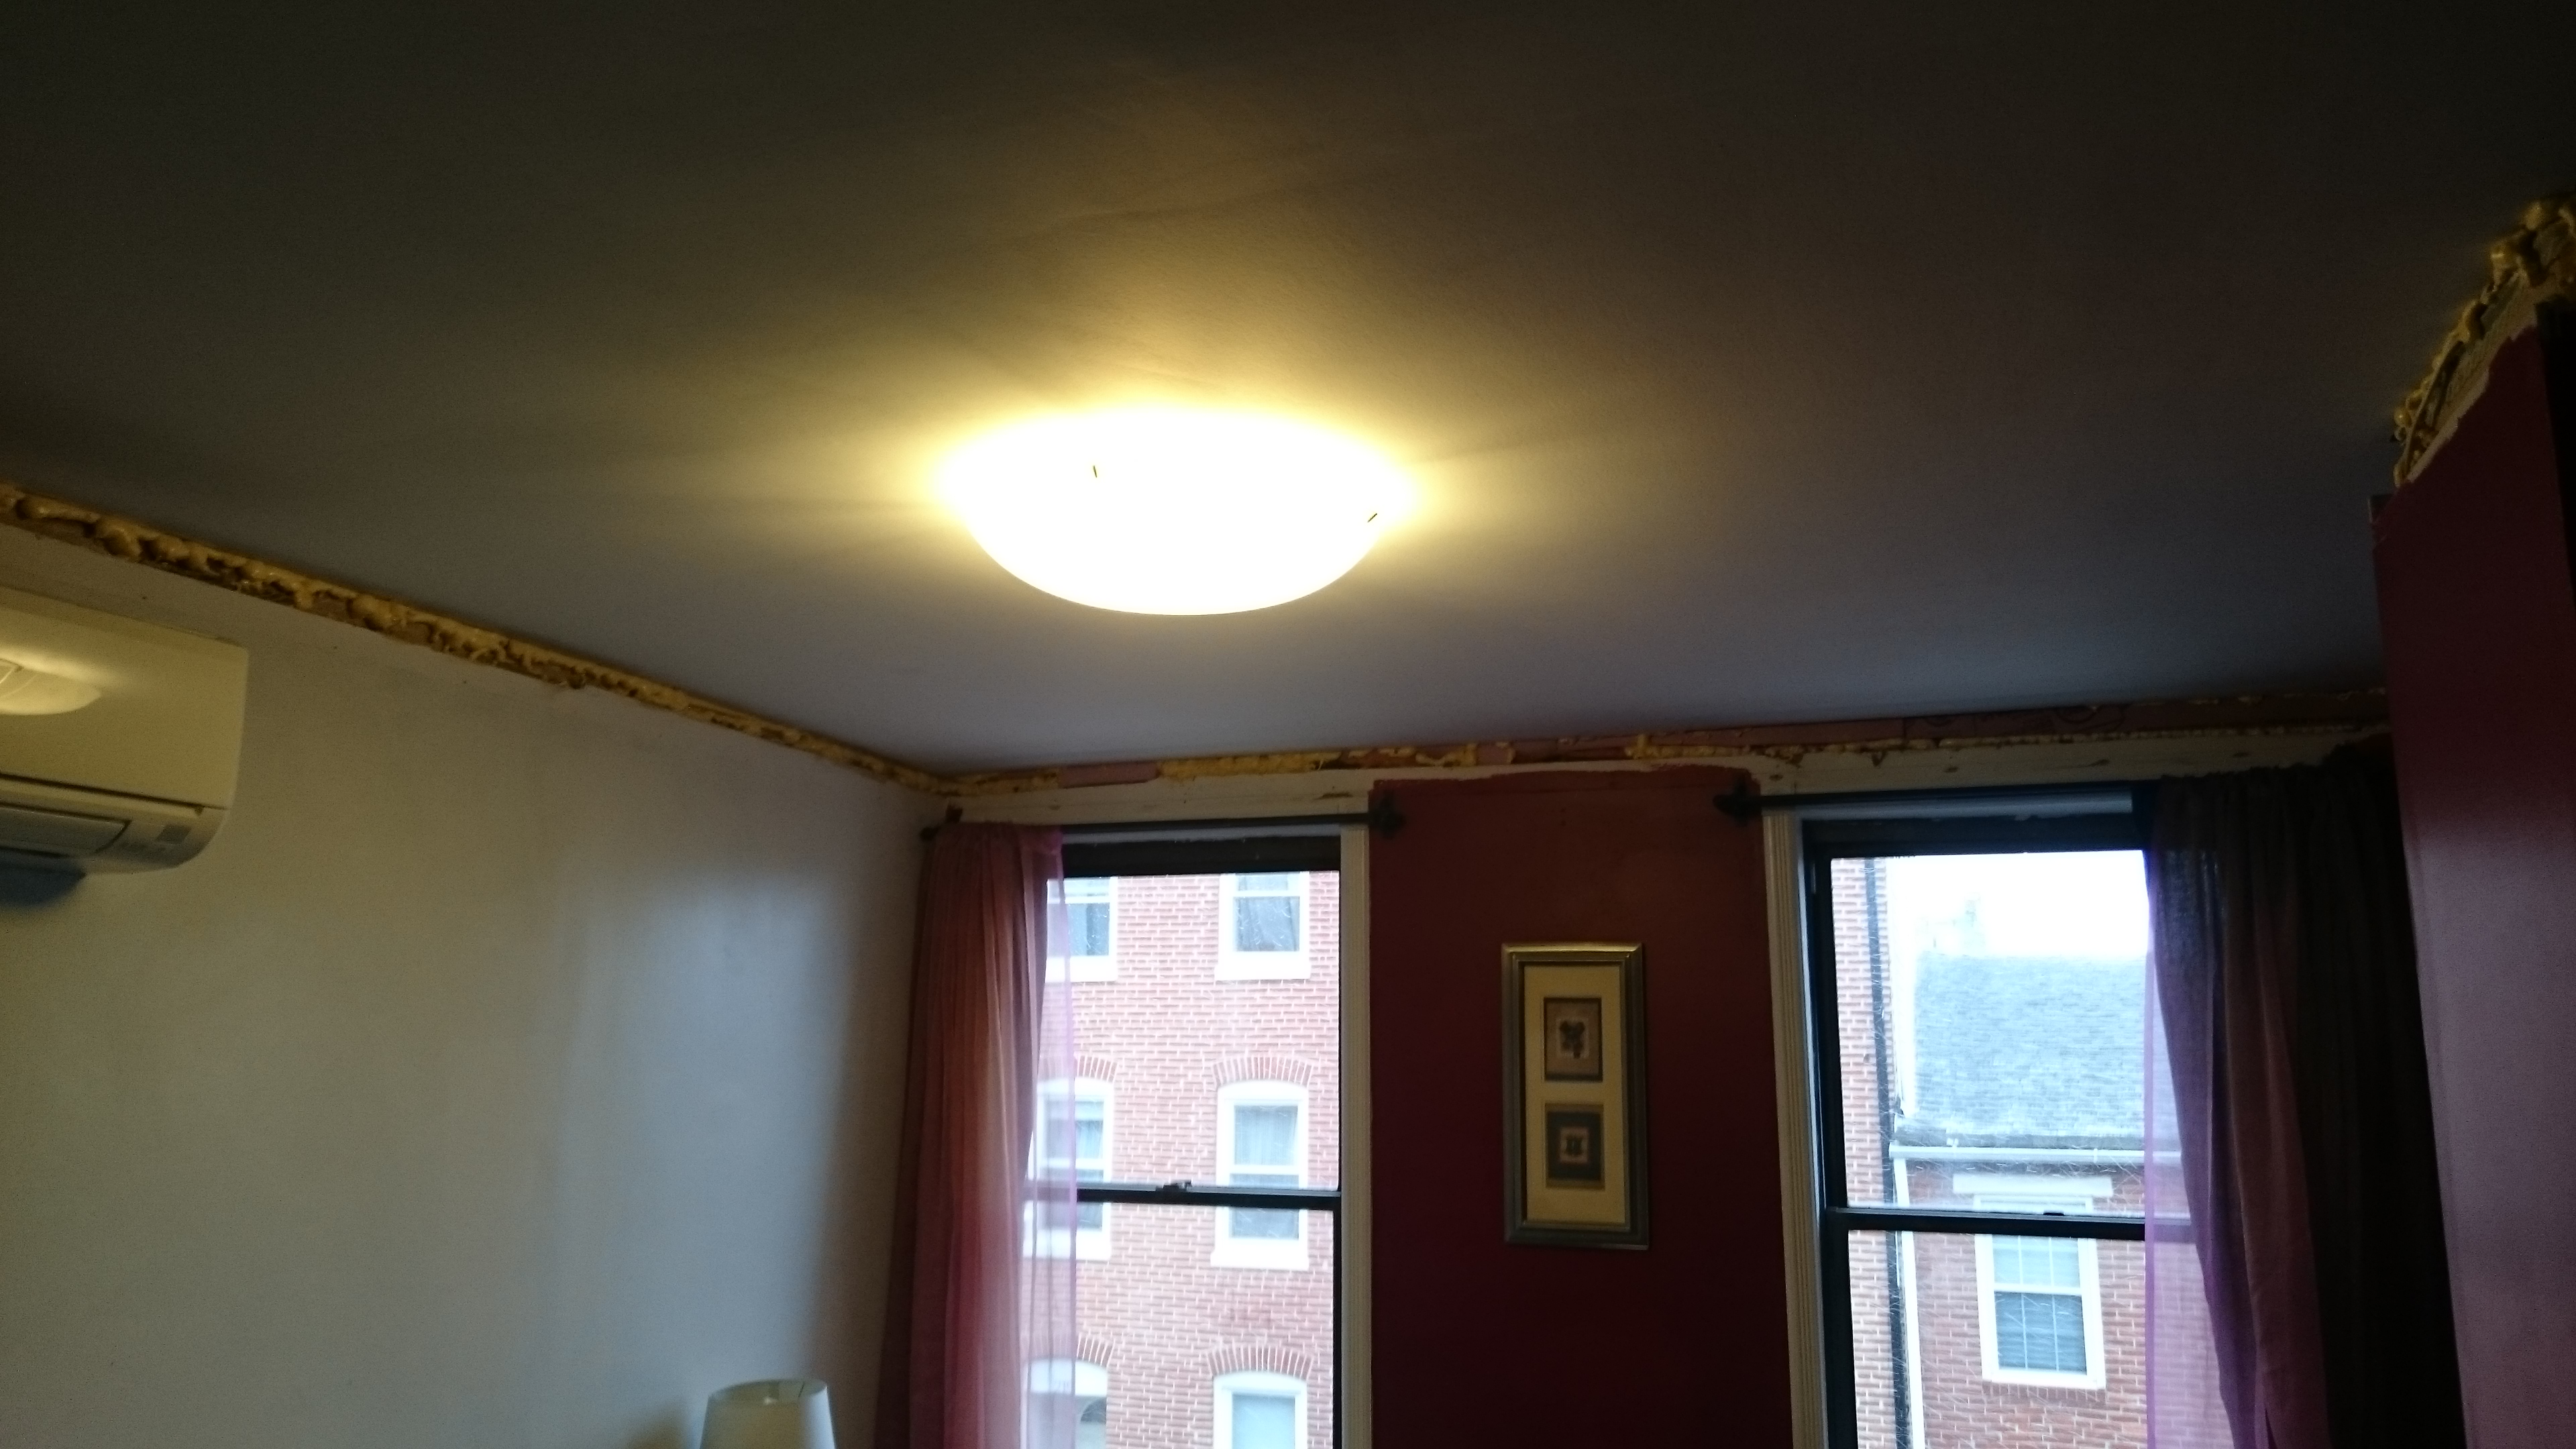
“Maybe its a little too bright.” ~Siri “It shows EVERY flaw in the drywall.” ~Mike
01 Monday Dec 2014
Posted in Cats, Home Improvement
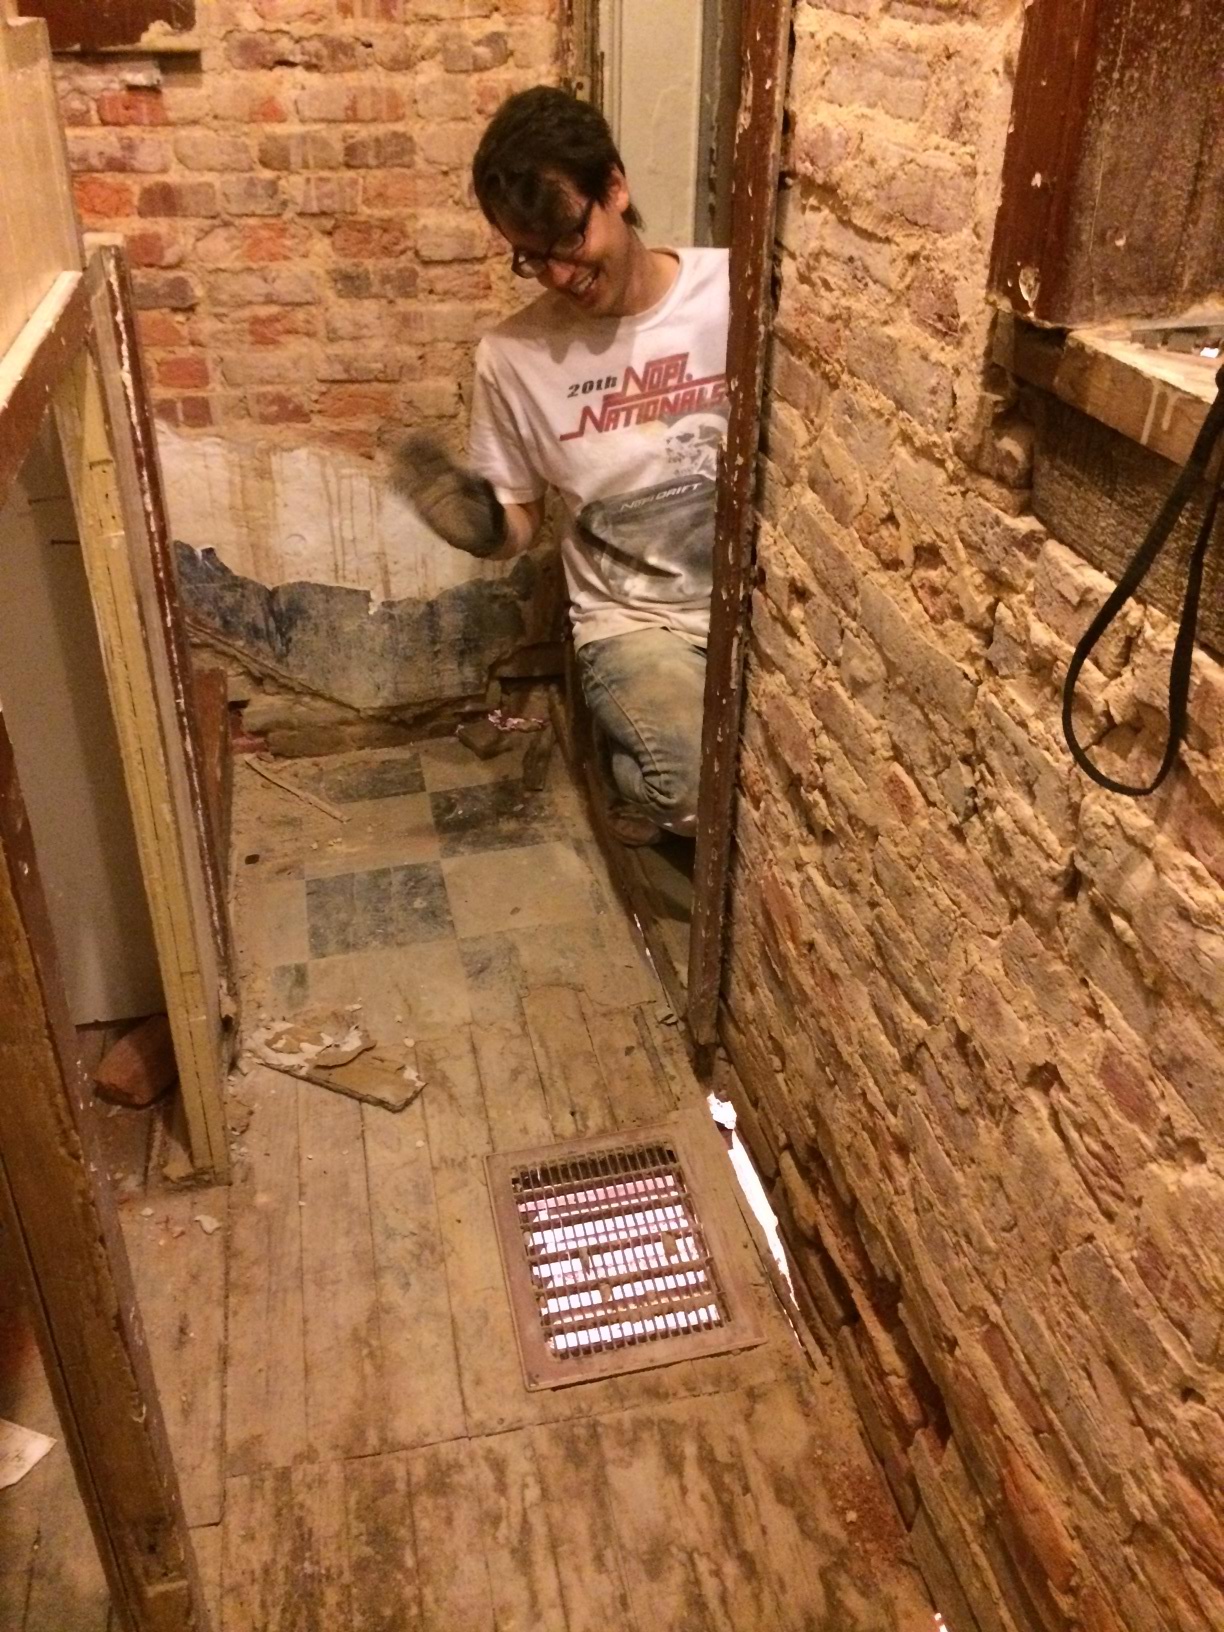
Finally I’m getting there. I had slowly worked down from the top of the 3rd floor, down the 2nd floor.. skipped ahead and worked up from the basement last February. I finally burned myself out in March, got back to it in September on the 1st floor, and here I am at the last wall over a year after I started. We had the Thanksgiving 4 day weekend and we were going to use it to finish up these damn bricks.
[We Must Have a “Before” Photo of This Somewhere]
This one was always going to be the hardest. Nearly all the salmon bricks had spalled and were crumbling. Some bricks you could crush in your hand. Pointing was pretty much out of the question as the bricks would crumble faster than the mortar. After the basement, pulling them out and re-laying them seemed like the best method. I started next to the back door. Most of those had been broken in half so I had to replace a bunch. Once I was sure the wall could carry the load without its assistance, I pulled the wood door frame. Hello 6″ wider doorway.
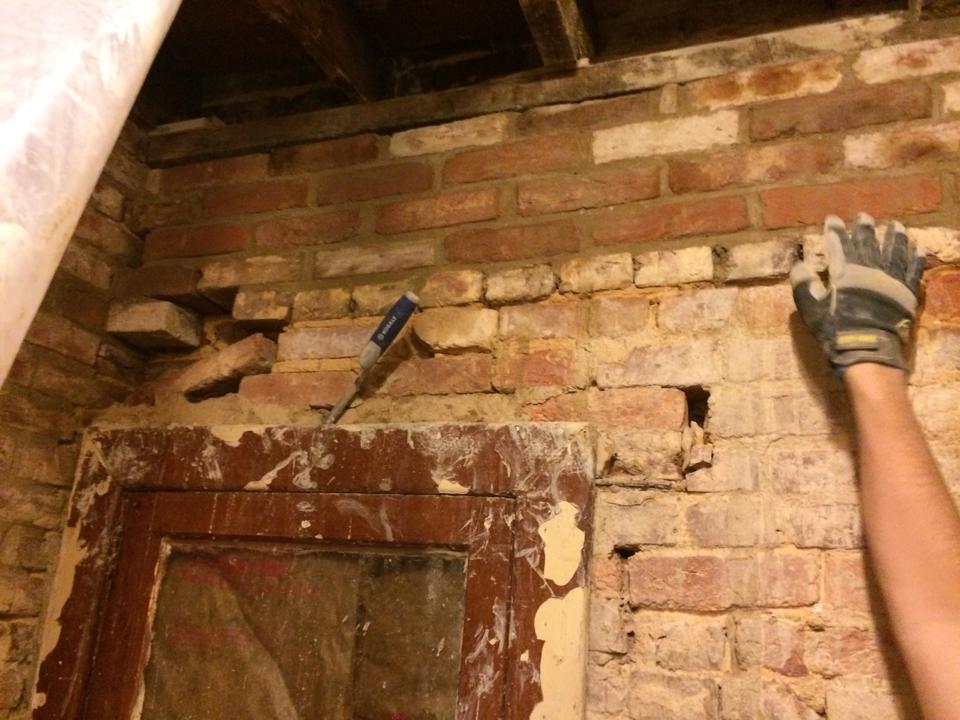
Next I did up top. Wanted a good frame around the bad area to add some stability when the window came out.
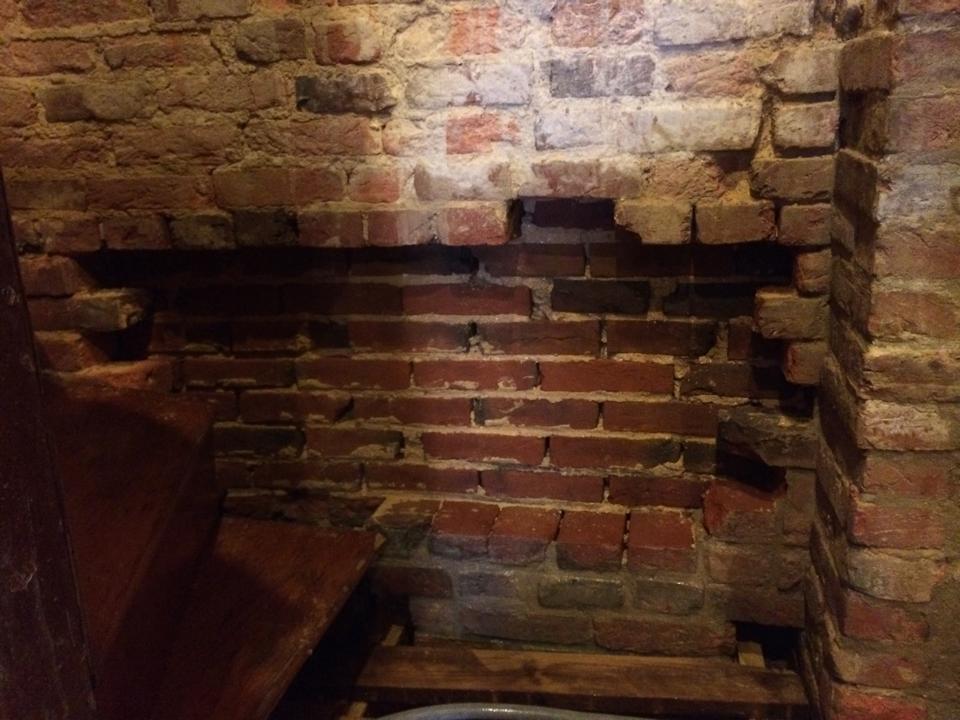
I could do a section between the header rows at a time.
Siri helped a lot. Laying bricks uses considerably more mortar than pointing so keeping me fed with mortar (and food) all weekend was her job.
Finally got to open our secret window… just before we tore it out. Who puts a plate glass window at the bottom of a staircase anyway?
Goodbye Window. Also note the paint so I wouldn’t forget to leave a pocket.
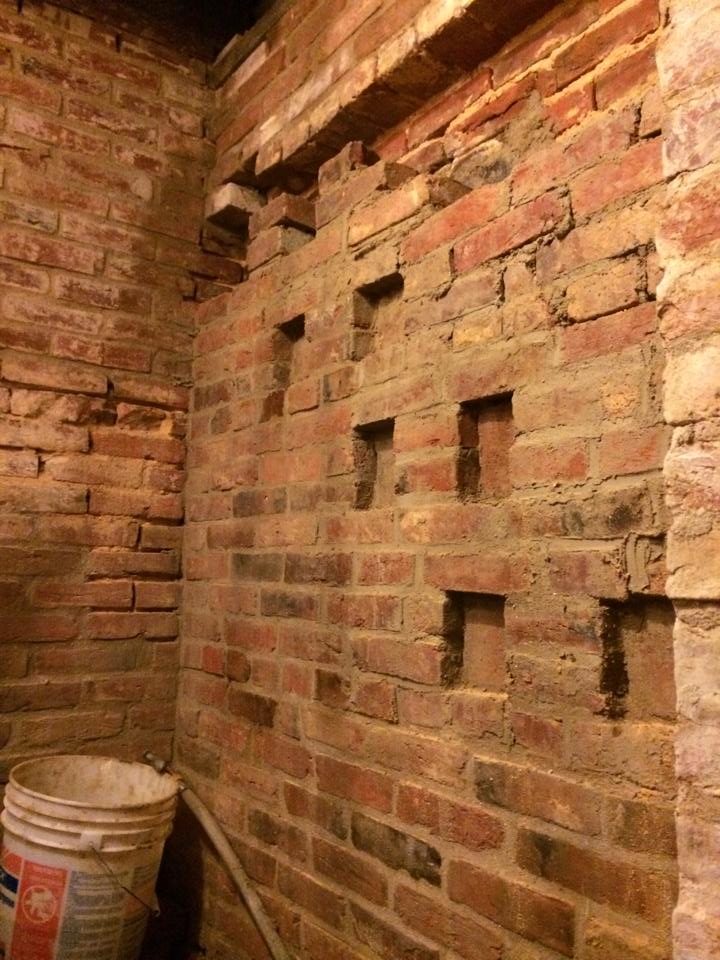
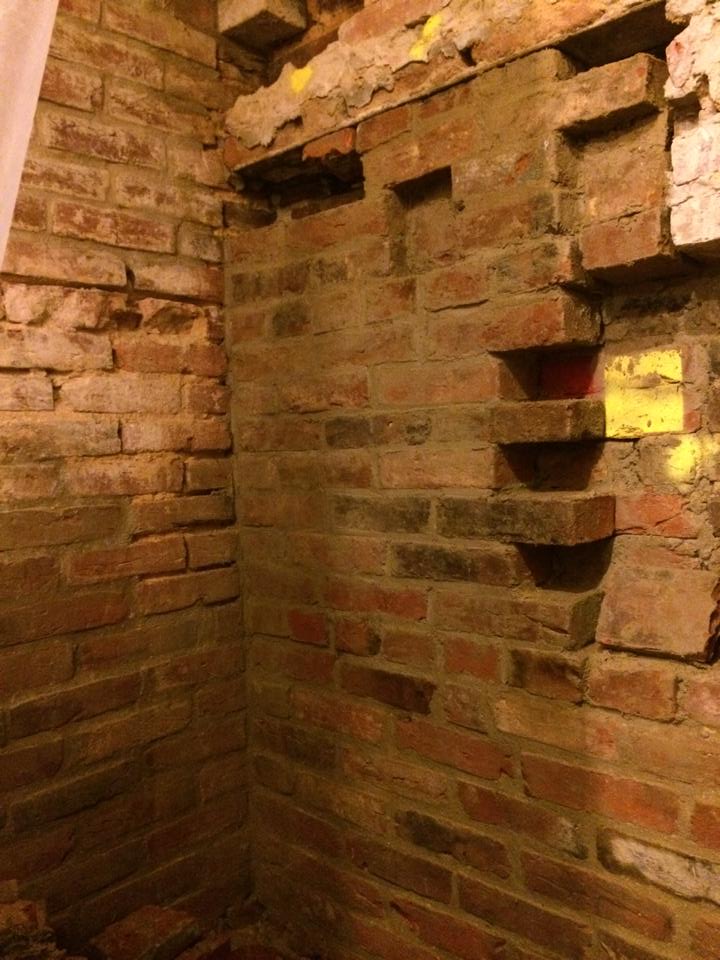
Almost there! Pockets!
What’s with the pockets? To top it off we had a special surprise we had picked up when we visited the Moravian Pottery & Tile Works outside Doylestown, PA. H.L. Mencken had incorporated tiles from this factory in his back yard a century earlier and I wanted to incorporate some too. We were not sure how we’d do it when we bought them, but Siri thought it over and decided that we should do a zig-zag going up the stairs with everyone in height order starting with Emi.
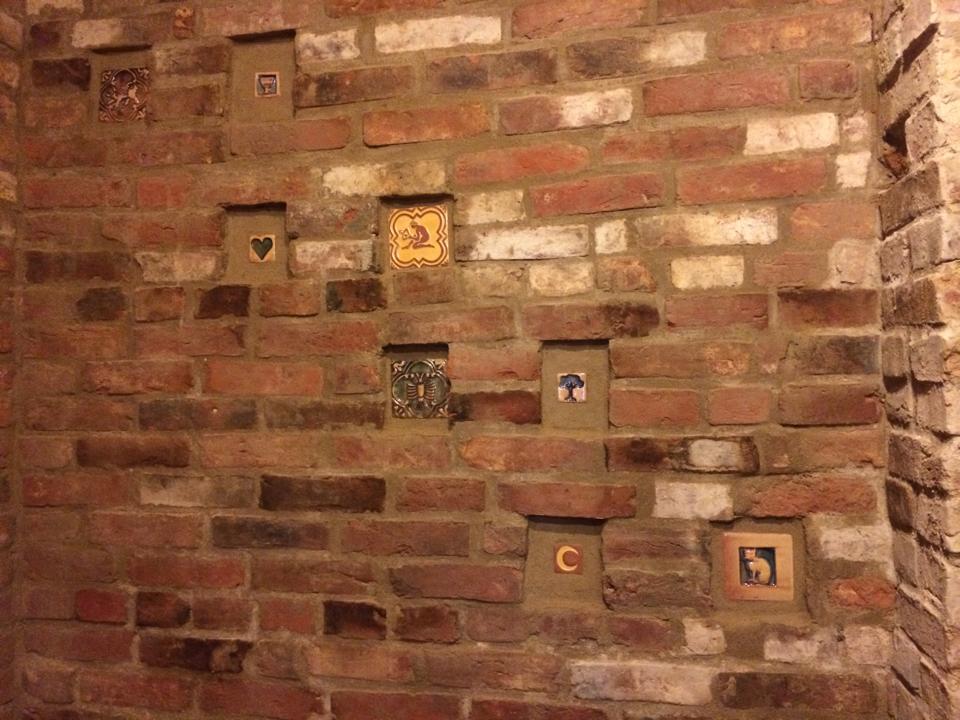
Our Super Special Moravian Tiles. Still need to wash down with white vinegar (acid) to remove the white haze.
From the bottom right we have Emi’s tile with her moon, because cats love the night. Next row up is for Iris. Her tiles is for her zodiac sign of Cancer along with a tree because she love to climb them (and is growing like one). Next row up is Siri’s with her Sagittarius zodiac tile and a heart, because she has so much love to give. Next row up is my Taurus zodiac sign and a goblet of beer, because I love beer. All of this is set in mortar Siri mixed using sand we brought back from the dunes of Liwa in the UAE.
Now it’s time to clean up and dust everything. Christmas is here and I want a clean space for the first time in months.
P.S. This is not the end. There are still bricks hiding behind the stair stringers. I will do these when I pull out the stairs. They’ll need to go quickly because the stairs will be out and that’s something we don’t want stretching out too long.
15 Saturday Nov 2014
Posted in Home Improvement

The first test. Kid approved.
Siri and I have been thinking about a hot tub almost since we started thinking about getting a house together. Hot tubs are excessive. Hot tubs are fun. We wanted a hot tub. We have included it in the roof deck plans; better get one now so we know it works before we try to build a deck around it.
Knowing full well we couldn’t afford a new one we searched for Craigslist for nice used ones starting a year ago. We even checked a few [awful] ones out. After a year we made the decision not to wait any longer. We found one that was relatively modern and working. We drove down to check it out and started working on the logistics to move it. We were lucky enough to get all of the wires, breaker boxes, conduit from the tub all the way up to the fuse box. This stuff adds up and was likely worth several hundred dollars. We did need a few little extras, but not much.
It was a tough move. We hired a “hot tub mover” to do this, but it was really just a tow truck driver and his sons. Getting it from the street to the back was a tight squeeze. Tight enough that I had to remove the iron gate on the alley. We got a few scratches, but nothing major.
We hired our friend Tom to wire this up. Hot tub electrics are no joke. 240V @ 50 Amps is a lot of juice…. sitting next to water. Code is pretty clear on this:
Anyways… we got it all wired up, conduit ran. Gave it a few days for an inspection and then finally I got to fire it up…. pumps worked for about 20 seconds, but it wasn’t full yet so I shut it off… that was the last I got out of it. Something died. There was an error code “E1”. Time to call tech support.
I was really trying NOT to learn how hot tubs worked; well fuck.
RANT:
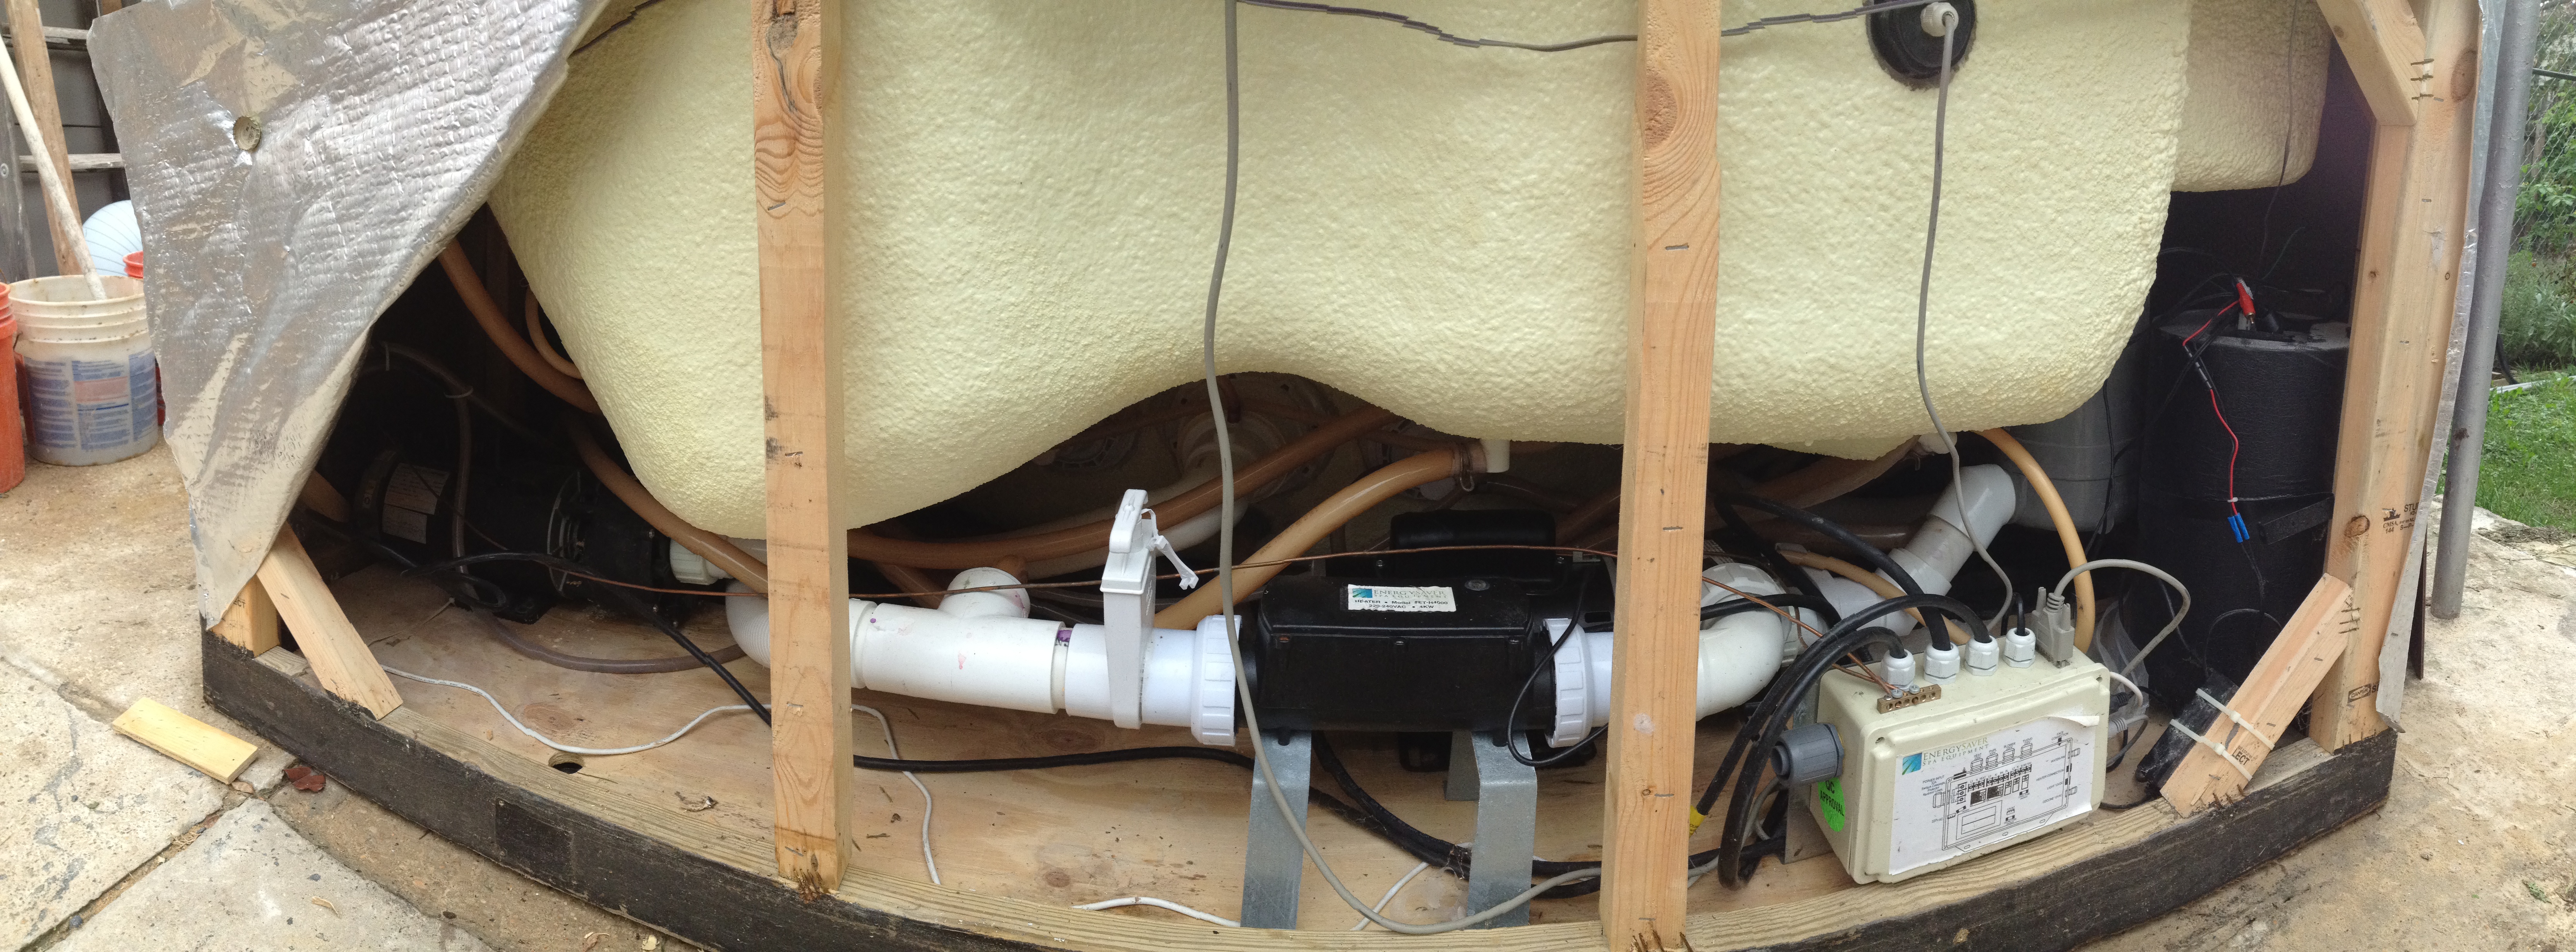
Their website says “Proudly Made in the U.S.A.” yet nearly every part is made somewhere else. Ethink, a Chinese company, makes the controller, heater and topside controls. The 2x4s are stamped with maple leaves. If you are using parts from other countries, be honest about it.. or at a minimum put those pieces together with some U.S.A pride.
This thing’s MSRP is as much as a car. You’d expect car like fit and finish. Sadly that’s not the case. This thing was screwed and glued together in a hurry and it shows. The pumps are screwed into a piece of plywood with the rubber bushings still attached to the base of the pump. Too lazy to eliminate a source of vibration I guess. Also the “sealed” electronics box would have been.. if they hadn’t just run too small of wires through the connectors without first seeing if they actually sealed. The sides are held on by 3/8″ strips of plywood and stapled 1/16″ into the boards. A tiny bit of movement and they just fall to pieces… and you will need to move them because there is no access panel on this thing, not even to adjust the subwoofer. Set it and forget it.
As for the technical service, they must be closely tied with their sales department because every path led to “replace part”. They said the “E1” error was a loose wire and apparently really hard to troubleshoot. “You should buy a new controller to see if that works.” I asked if they would take it back if it didn’t fix the problem they said “no returns”. What’s the incentive there to actually support your product? Fuck Energy Saver Spa alias Laguna Bay Spa, Home and Garden (Home Depot), Dr Wellness.
END RANT.
Since the price to replace the control box (had to buy the whole box, not just the circuit board) was $400, we decided to shop around. Turns out a brand new controller with a warranty, documentation, integral heater and included top side controls was the same price. We ended up buying a Gecko YE-5. It’s relatively basic, but it supports all the features we have. Of course this won’t drop in, but its not rocket science. I had to do some PVC pipe work to lower and lengthen the heater location. We reused a few parts, bought a few from home depot. Pretty easy stuff. Finally got it in a full 3 hours before the first big freeze of the year.
Future plans include adding a 120V outlet so we can add a Bluetooth adapter to the stereo and new speakers (one is blown). Plans also include reducing our operating costs by insulating all 4 sides and getting the ozonator working again.
Next time I’m just going to build one from scratch.
14 Monday Jul 2014
Posted in Building, Home Improvement
I have been building a few things: A Barbie house, and a tower made out of blocks.
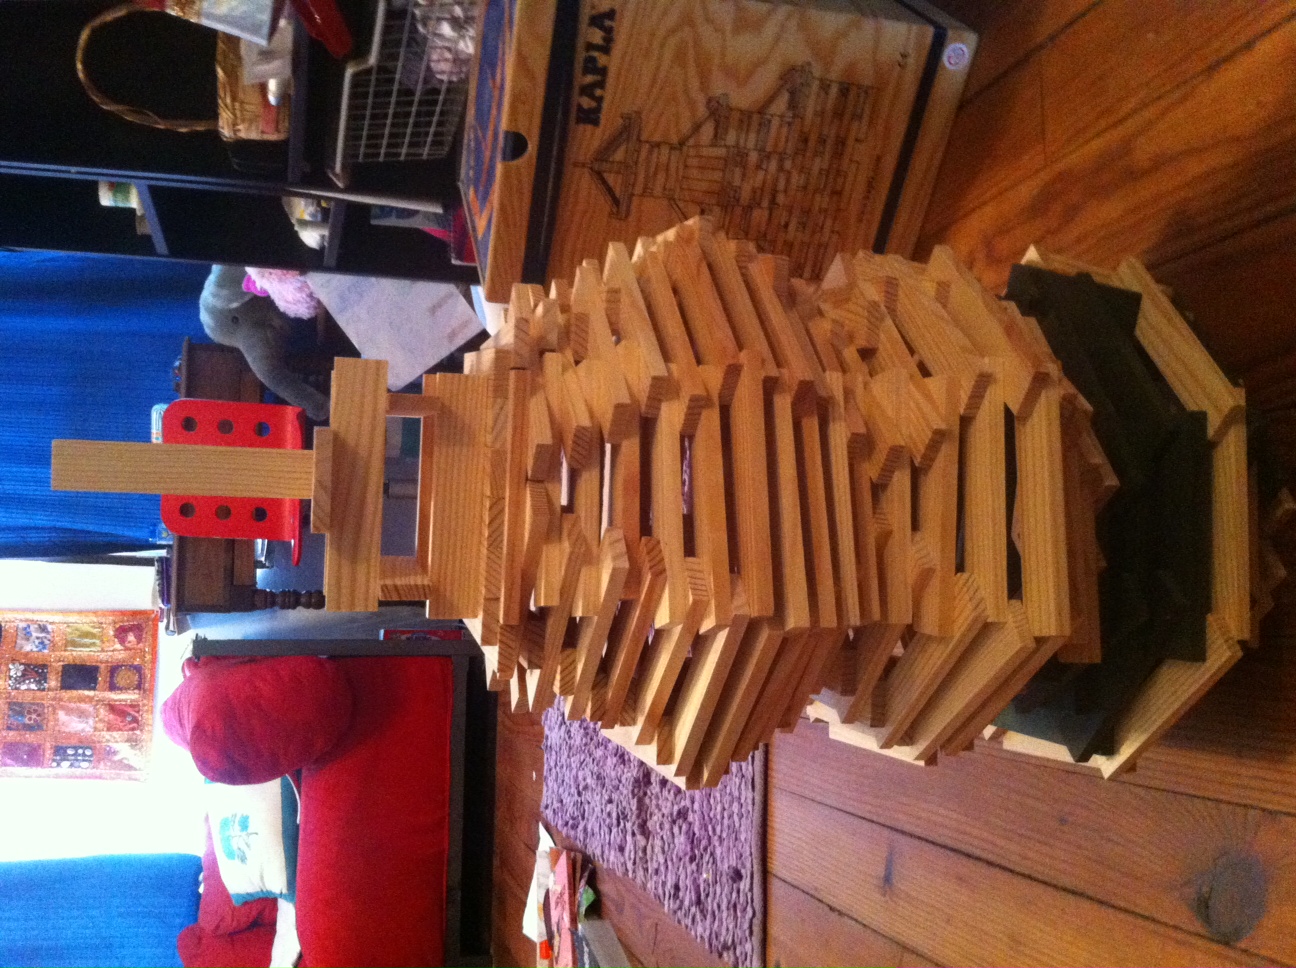
This is the tower that I built
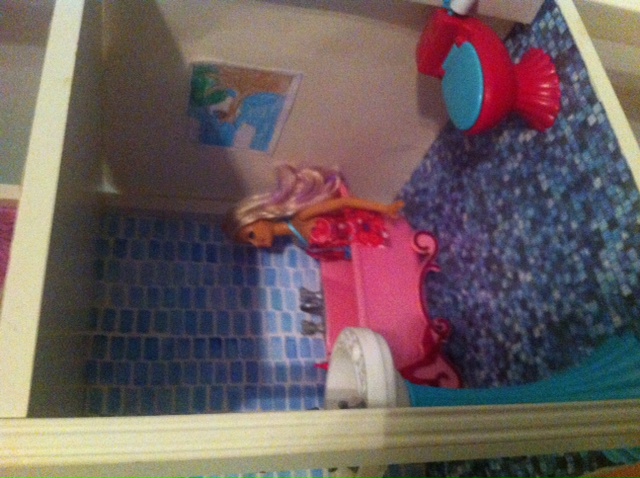
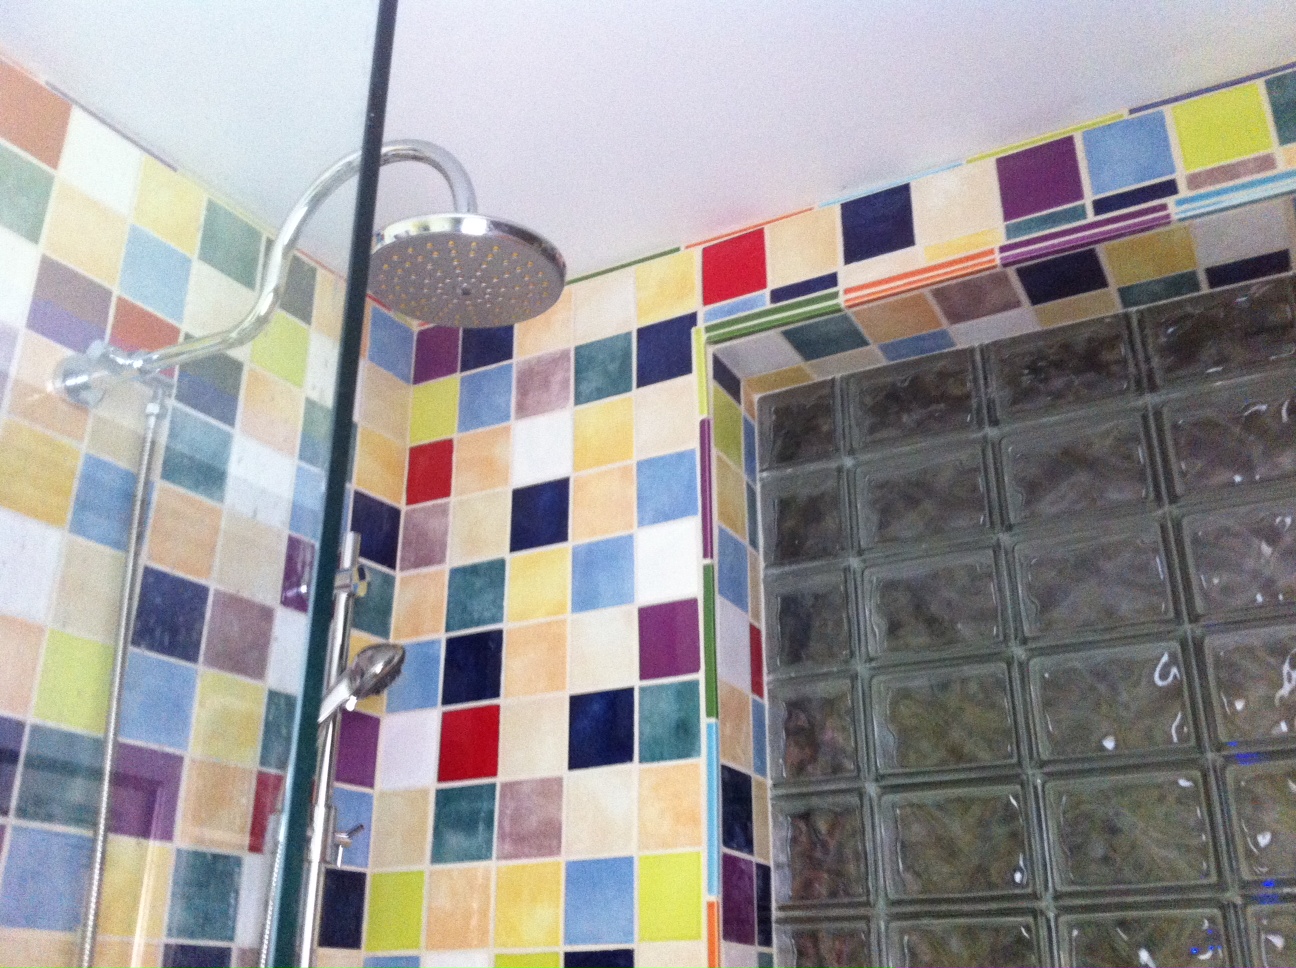
This is the one room that I have finished(except I still need a few finishing touches) in my Barbie house– the bathroom
30 Monday Jun 2014
Posted in Home Improvement
My mom, Siri, has been working for a long time on the tiles in the bathroom. They were finished in the beginning of May, but no one ever said anything, so I am posting this for my mom. We also have a hand held shower. Now, Mike and Siri are thinking about making a countdown timer on the glass blocks, so anyone who stays in the shower for too long will lose the hot water! They want to make it out of lights, and I am still not exactly sure how it will work.
29 Thursday May 2014
Posted in Home Improvement
For the first time in likely 30 years, we have the morning light shining through our transom window. About a year ago I cut away the drywall and wood paneling that had been covering this up and removed the window for cleaning. Since then its largely been sitting, but finally I got some time to remove the old paint, clean everything and repaint it. Just last week It went back in. After two overcast mornings, we finally had some sun.

We’ve also added a new floor lamp be the front window. The style is very similar to our transom windows. Although its got the old timey look, the lamp is actually pretty new.
This lamp I found advertised online for $20. Not sure on the age, but its built solid. Probably weighs 10 lbs. No idea where we will put it, but for $20, I didn’t want to pass it up.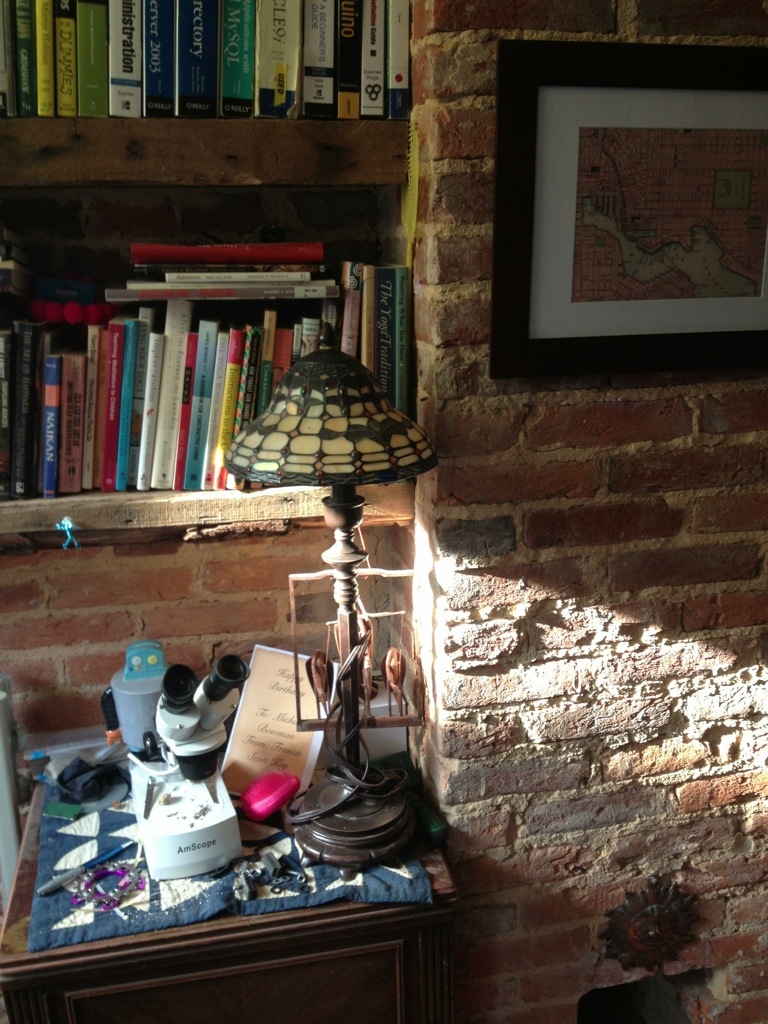
26 Wednesday Feb 2014
Posted in Cats, Home Improvement
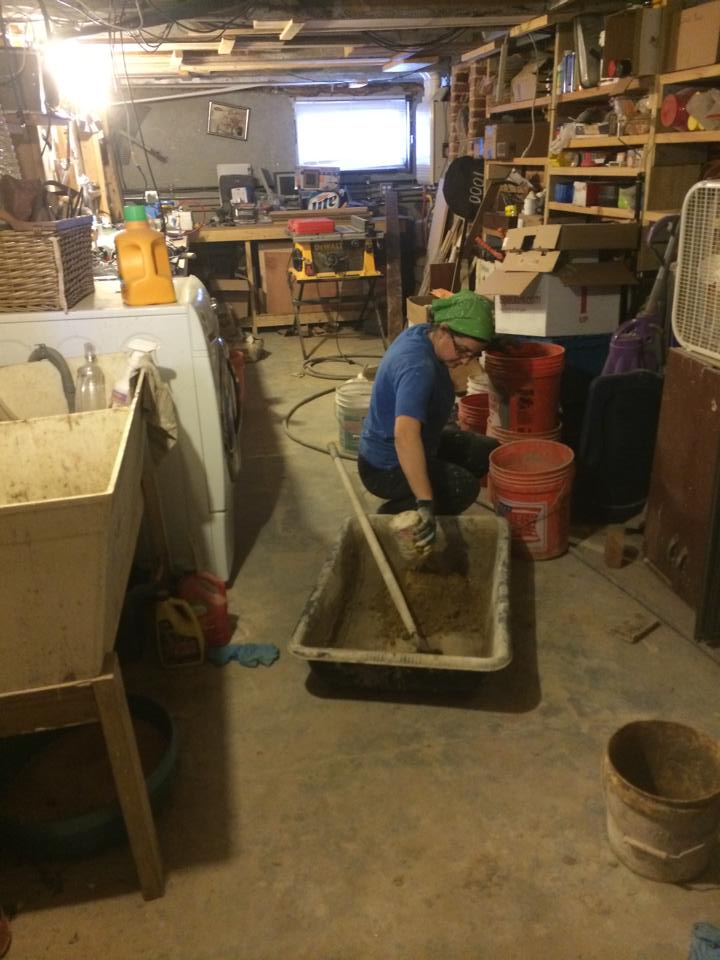
About to get to work
The next stage of the brick project is the stairway down to the first floor. Since cleaning up is such a pain on an uneven floor, I wanted to install the new floor first. Easier said than done though. The floor is held up by joists that were sitting on long since rotted away boards and bricks. This caused them to be uneven and to sag / creak when walked over. Previous owners had made matters worse installing heat registers in the floor several times. Underneath in the crawlspace many of the bricks had started to crumble. When bricks fell out, they would fill the hole with fiberglass insulation (WTF??). Its amazing we never fell through. In some places the bricks were missing five feet down. The board and the 7 bricks on top of it were all moving as you can see in this video:
It was pretty much the same story all the way around. I decided to replace all the bricks between the stretcher courses. I’d do a vertical section here and there and leave the old bricks in to hold up the house. I’m still alive to write this so I guess it worked. In the end I replaced a 24″ strip between stretchers all the way around where the floor would go.

And….gone! Only the minimum needed to hold up the stairs was left in, but even that would go by the end.
As I moved to the back of the stairway, more and more of the rotted joists had to be removed. In the end we hung the stairs with a 2×4 from the joist in the ceiling above and used a 2×12 plank to get across the pit. (We even hosted a party like this.)
In the back, as I replaced the bricks, I left 3 pockets to install the 2×8 joists in as I decided to have the joists run perpendicular to how they were originally. This has the added benefit of making trips into the crawl space less likely to cause head injuries. I’d use joist hangers on the last joist at the back of the kitchen and I’d double up the middle joists to be able to carry the extra weight of the stairs sitting on it.
Finally with the bricks done and the joists in we installed the subfloor. Next is the stapling up of our final 1/6 floor heating. This will cover the kitchen and the stairway. Up until now, we had no heat in that end of the 1st floor and the other half could barely keep up on the colder days.
10 Friday Jan 2014
Posted in Home Improvement, Sketchup 3D
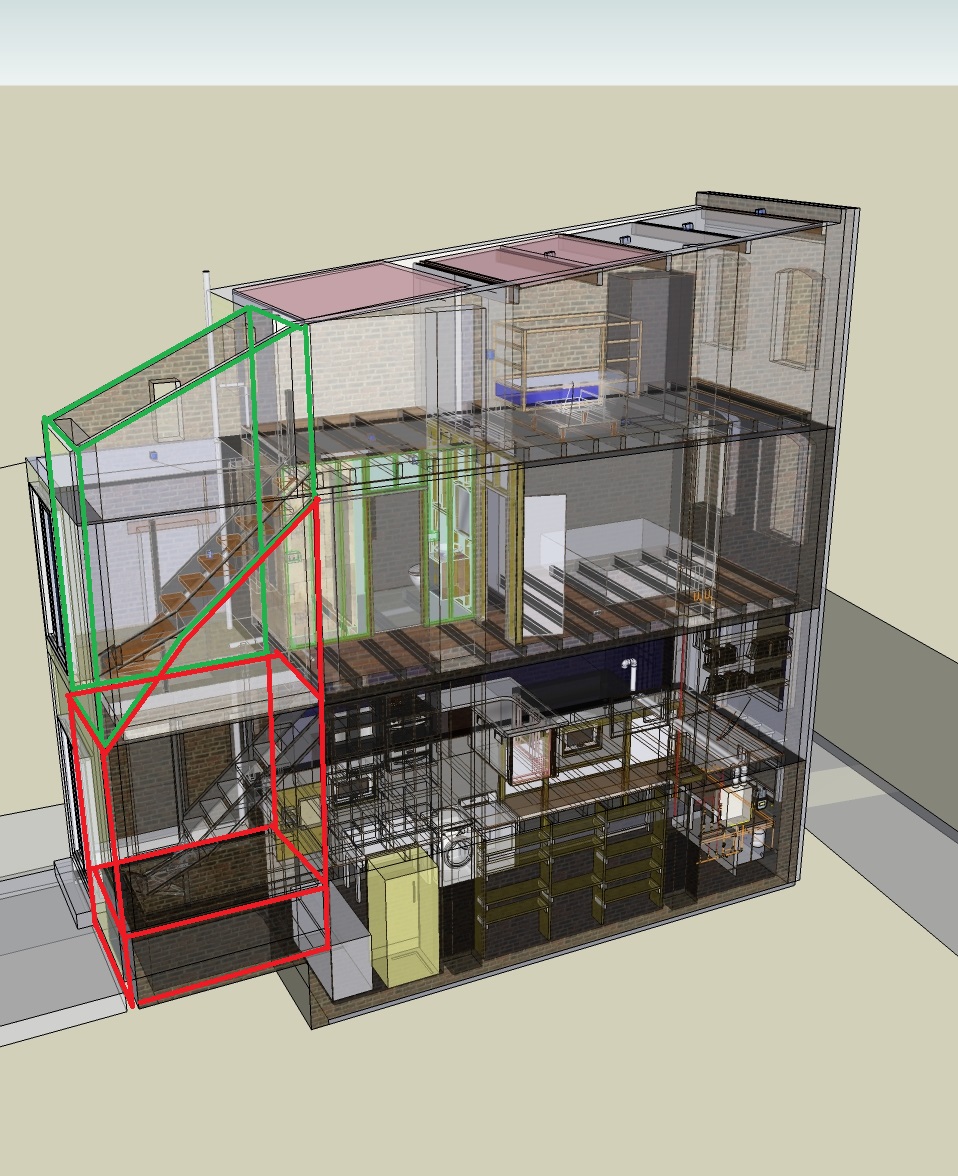
Green is what is done… Red still needs to be done.
I’m finishing up the first half of our brick pointing project this week. I’m ready for this pointing to be over. Unfortunately, I’m only halfway there. Pointing really isn’t that bad other than it being hard on my body. As long as I’ve got my tunes on, I pretty much forget I’m doing it. I’m just ready to move onto other things like trim. Also it makes a mess throughout the house.
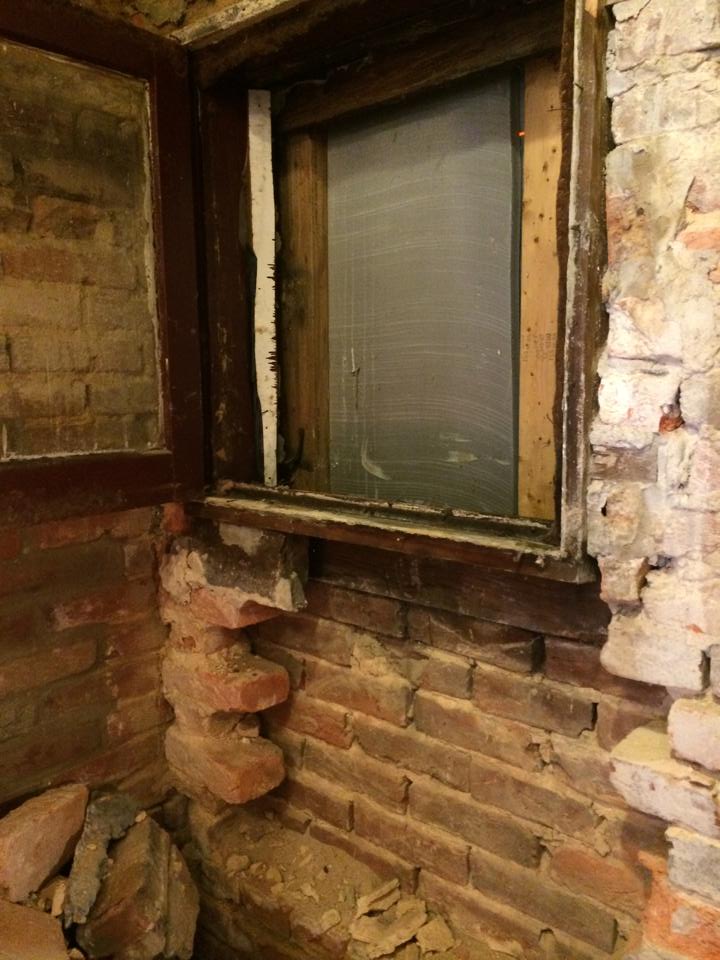
I’ve saved the best for last. I needed the surrounding bricks to be strong enough to hold themselves up when I took out nearly everything from the floor to the ceiling. I’ve been careful to leave a pyramid un-pointed from the door lintel up to the window frame.
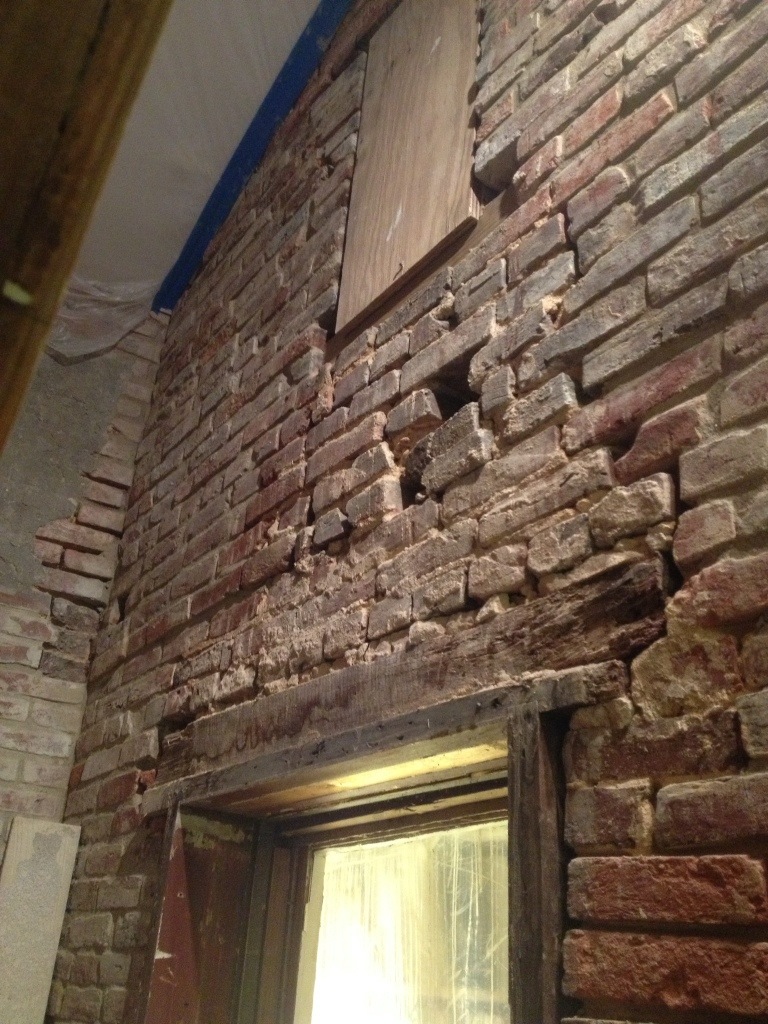
The bricks here are basically falling out of the wall. The lower bonding bricks on top of the lintel are actually sitting on 2″ of crumbling mortar.
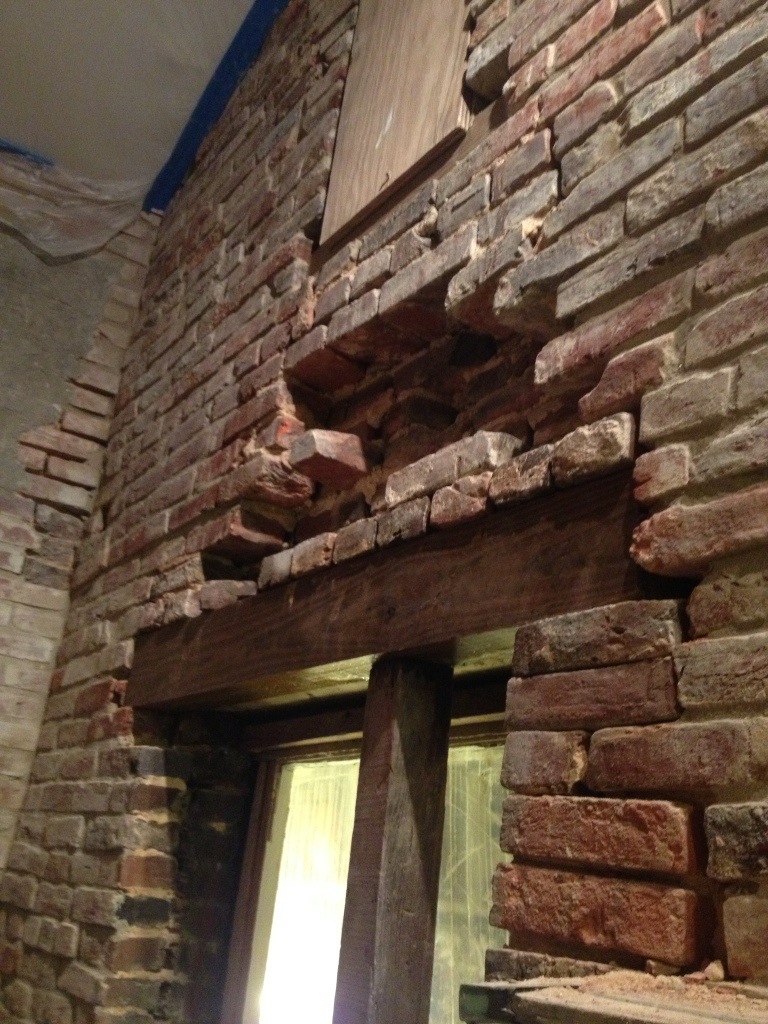
In the end I removed all bricks not in a bonding course from the door lintel to the window frame. I used a jack to lift up the treated 4×6. Now the bricks sit right on it rather than on 2″ of crumbling mortar.

Here is the same area finished. Bricks sit directly on the lintel and it all looks WAY stronger.
To finish the 2nd + 3rd floor stairway, all I need to finish up is the doorway. After that we’ll use some acid to take off the mortar haze and then seal it up… then on to the 1st + 2nd floor stairway. So tired of pointing bricks.
09 Monday Dec 2013
Posted in Home Improvement
We call this spot The Dungeon. Under the stairs at the back of the house, this was the old coal pit based on the black walls. Since then it seems to have been used as storage. When we first saw it, there was insulation in the rafters growing the most bizarre white curtains of mold. It was terrifying. The floor appeared to be dirt and it always seemed to be moist.
I started cleaning this out a few months ago. The floor wasn’t dirt after all. The inch or so of soil on the ground was actually boards, boxes and other things stored in here so long ago that they had turned into dirt! Under it was a thin (1/4″ in places) layer of concrete on top of old bricks and sand.
My theory is that this is the mortar and brick leftovers from construction 150 years ago that had fallen to the ground during construction. I sifted each shovel of dirt with a 1/4″ mesh. This helped separate out the sand from the larger pieces. It also helped me to find a trove of old porcelain shards, glass, coal, oysters, even bones. Iris and I are cleaning these up and will make a shadow box for the front room.
I planned to dig down until I found the footers, but no further. It didn’t take long. Once the rubble was out I hit dirt. On the edges I tested a few spots to see how far down they went. On at least one side, not far. It looks like they just laid the bricks right on the dirt. No footer or anything. We were ready for new concrete.
We next had to line up all the materials and tools. Pemixed concrete would have been like 20 bags. Luckily we found my grandfather had an old cement mixer which meant we’d have a much easier time. We had all the sand we needed and only had to pick up 2x 94lb bags of Portland cement and a half ton of #57 stone. Our friend Ian gave us the last materials: 3mil plastic and metal mesh.
I relaid some bricks at the mouth of The Dungeon to get it up to a level the concrete could come to. Next I threw in a few buckets of crushed up bricks from the rubble piles and stones on top of that. Next was plastic. Dad came down to help on Saturday and we cleaned up the remaining piles of rubble to have an area to work. He then started mixing. I started carrying.
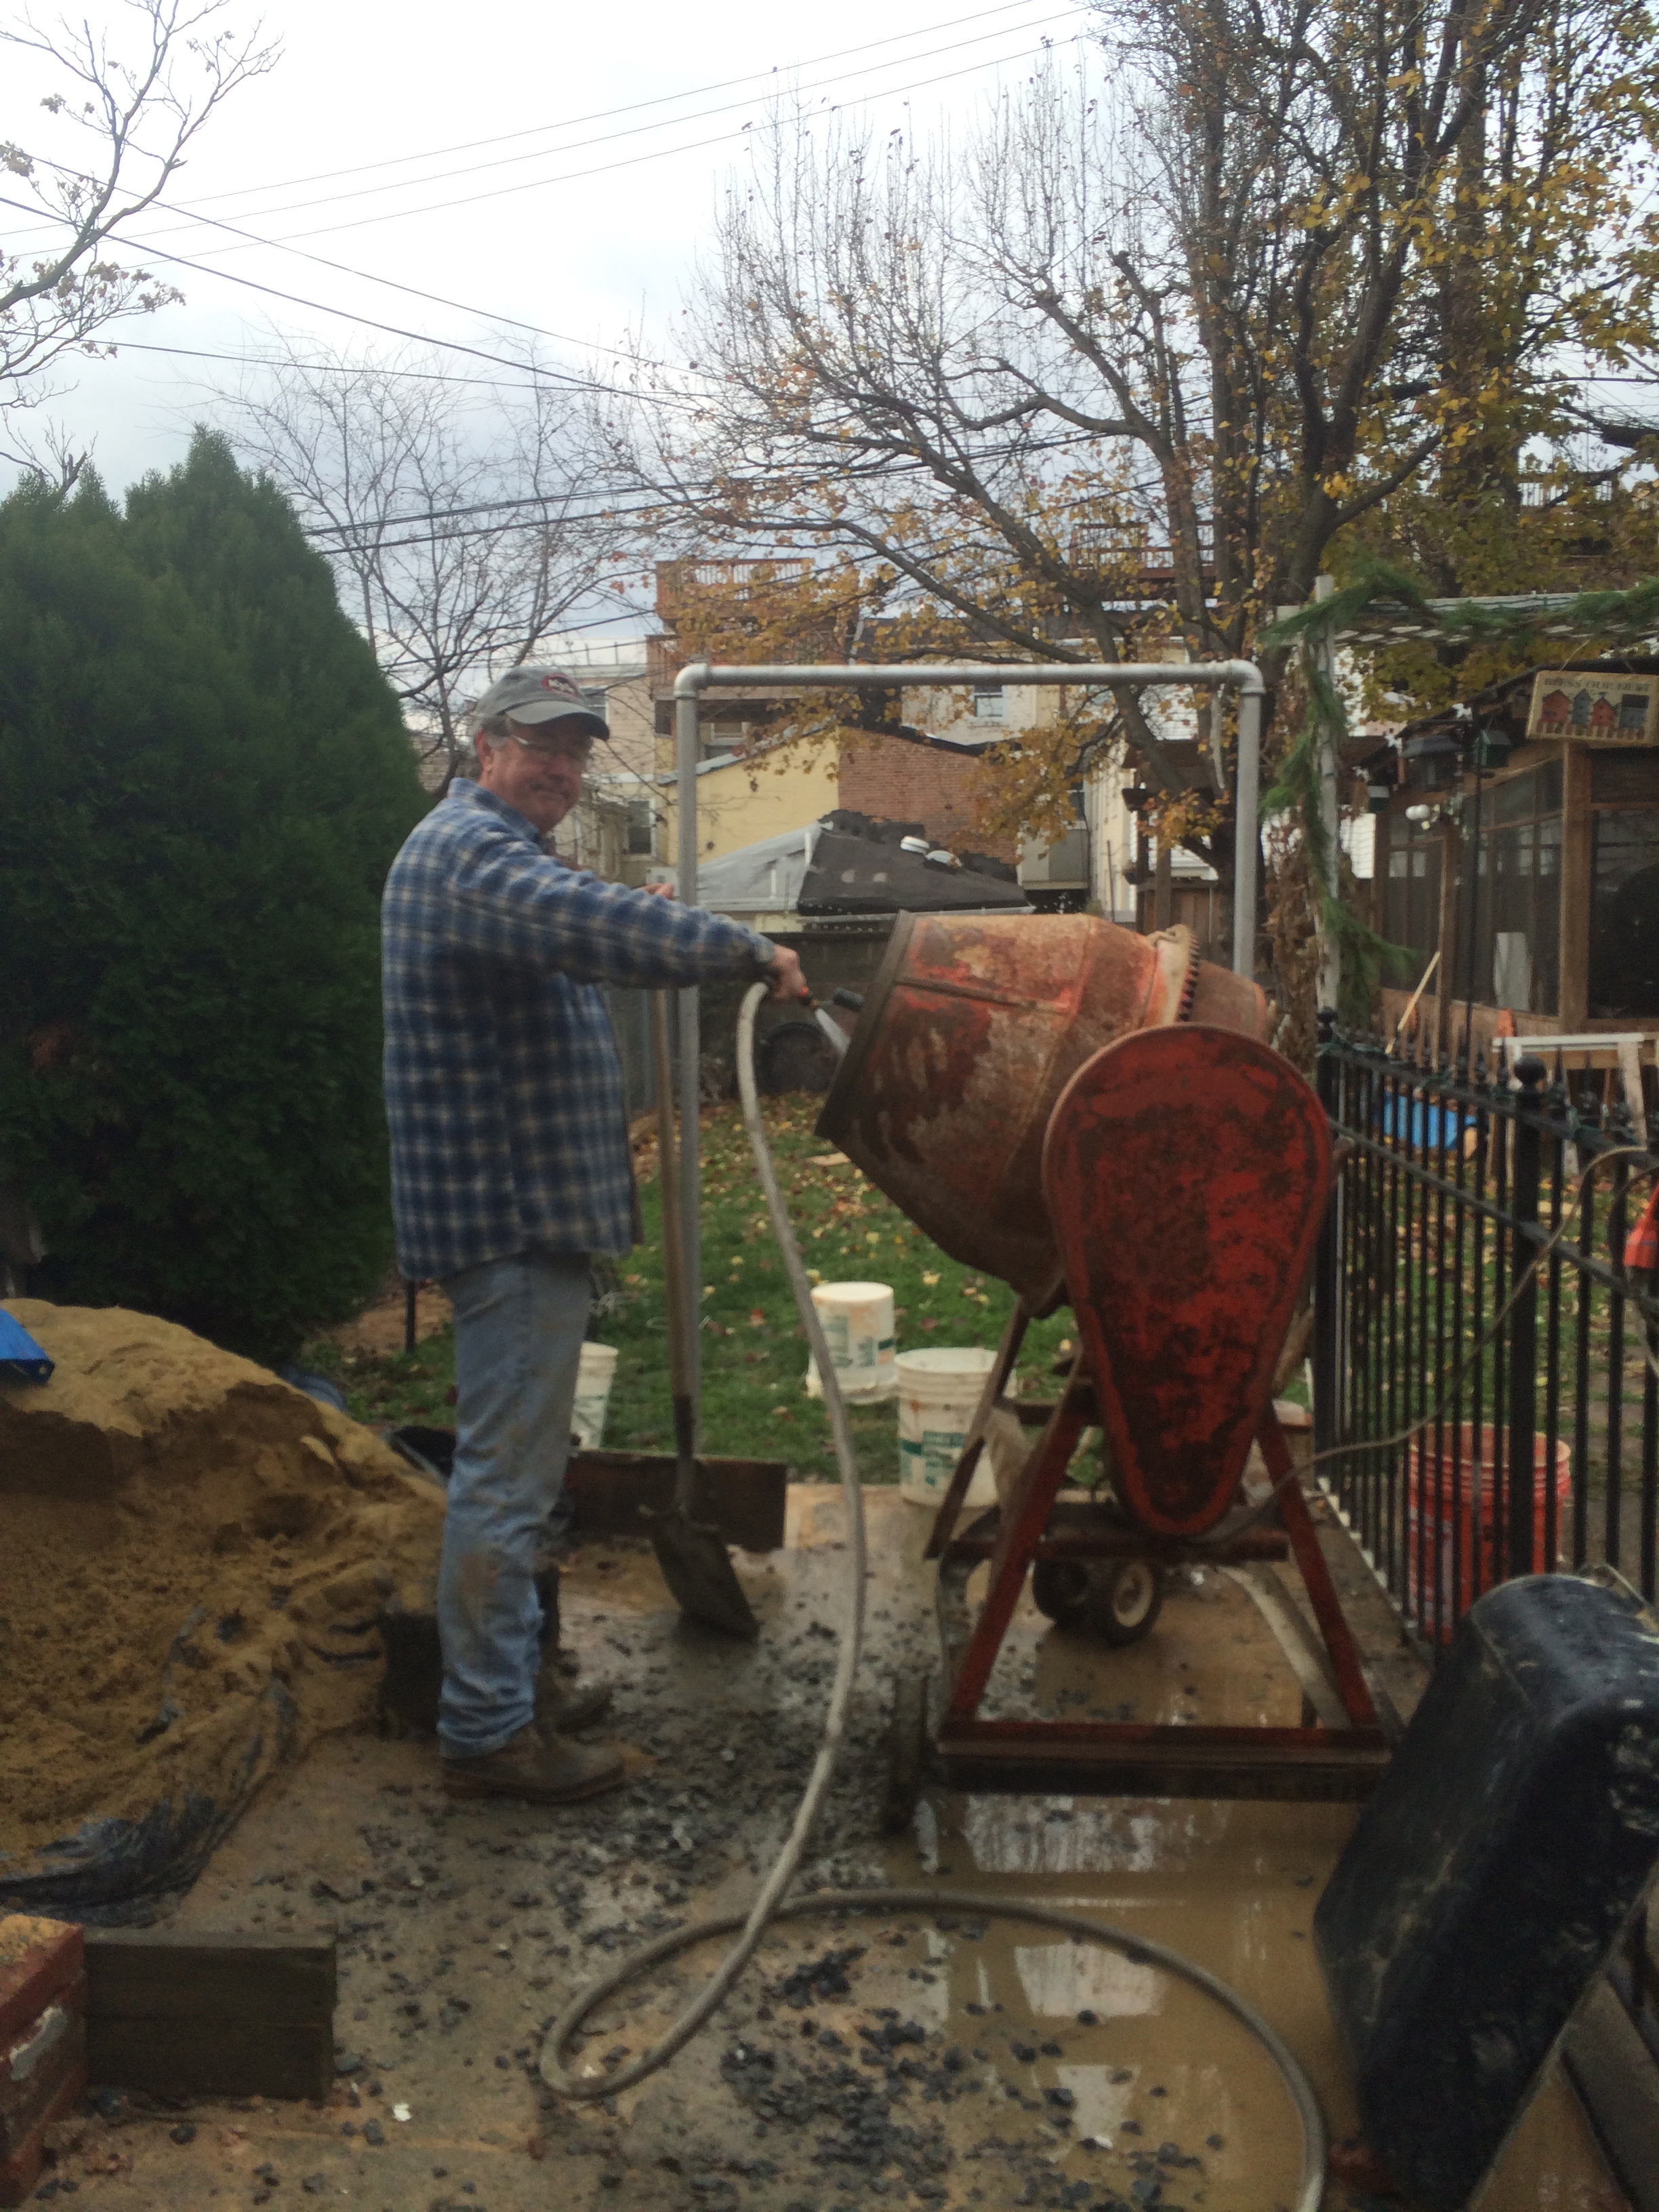
Dad at work
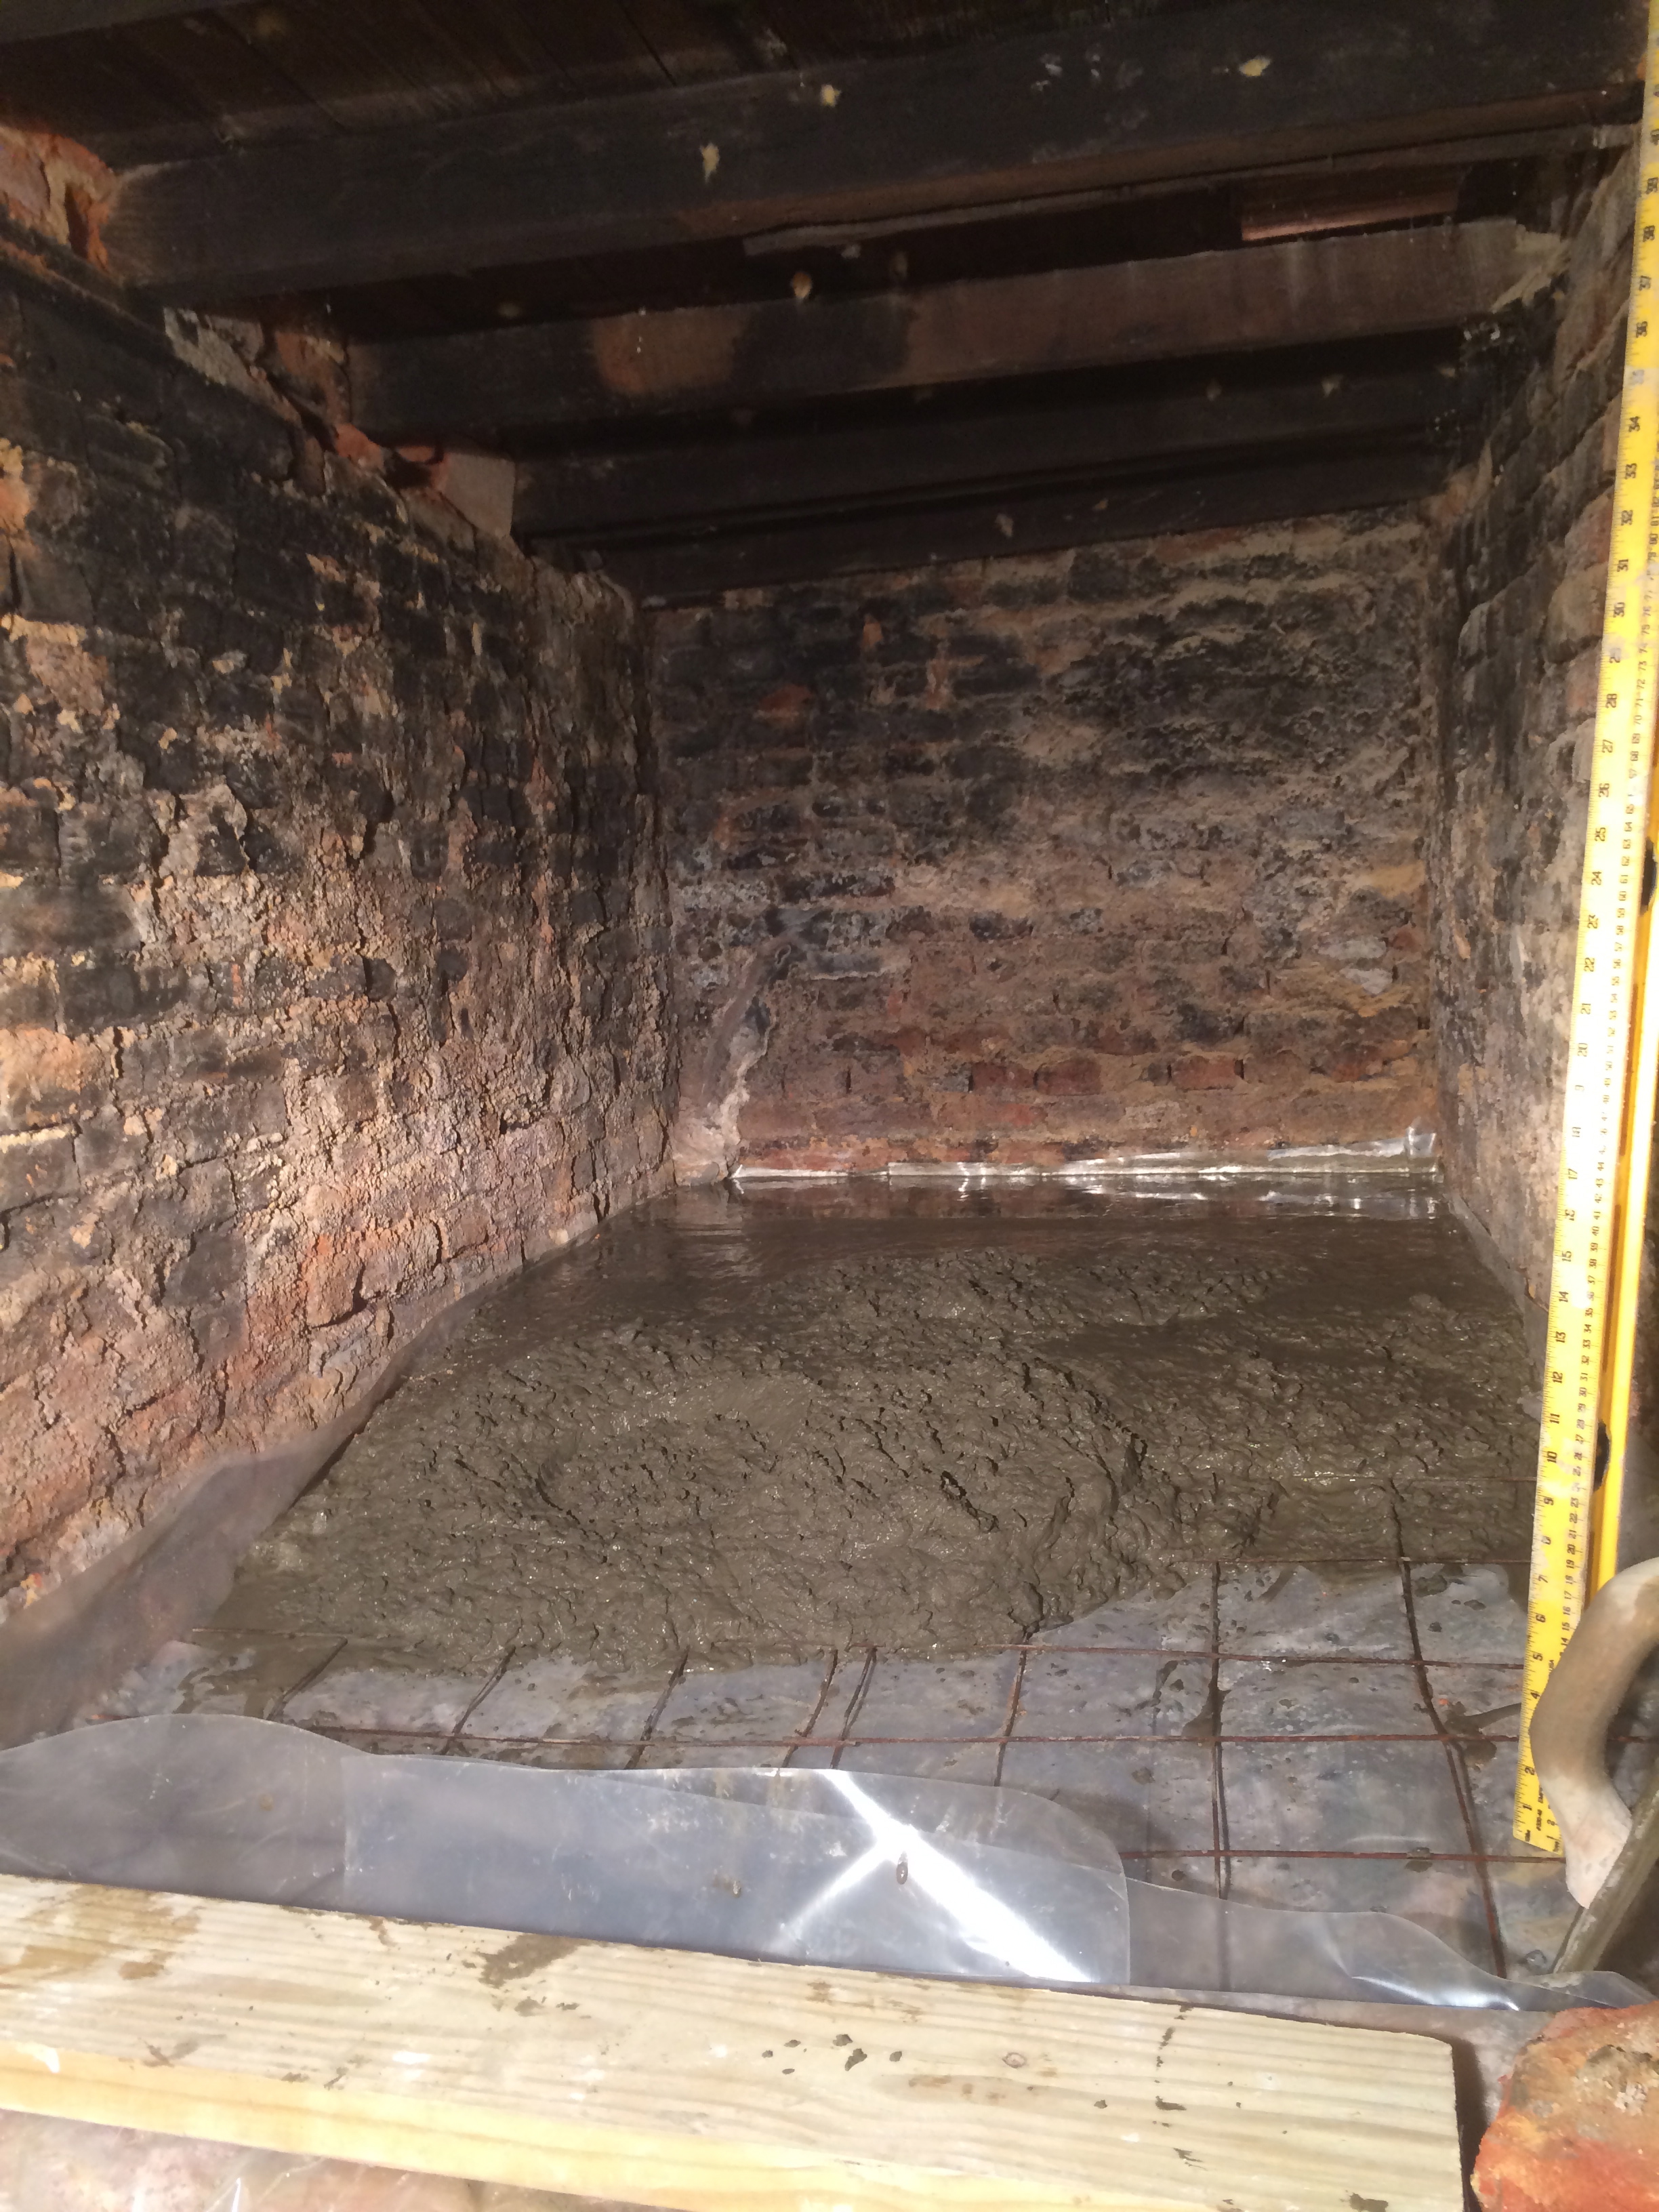
Pouring… half a bucket at a time (they’re heavy!)
Other than seeming really wet, it went smoothly. We checked it for level side to side and to have a 2 course drop from back to front. I floated it nice and flat and then took his advice and not mess with it too much. I did a round with the float around 8pm and another with the trowel at midnight, about 12 hours after we started. The next morning it was able to be walked on and I could knock down some ridges. Looks professional!
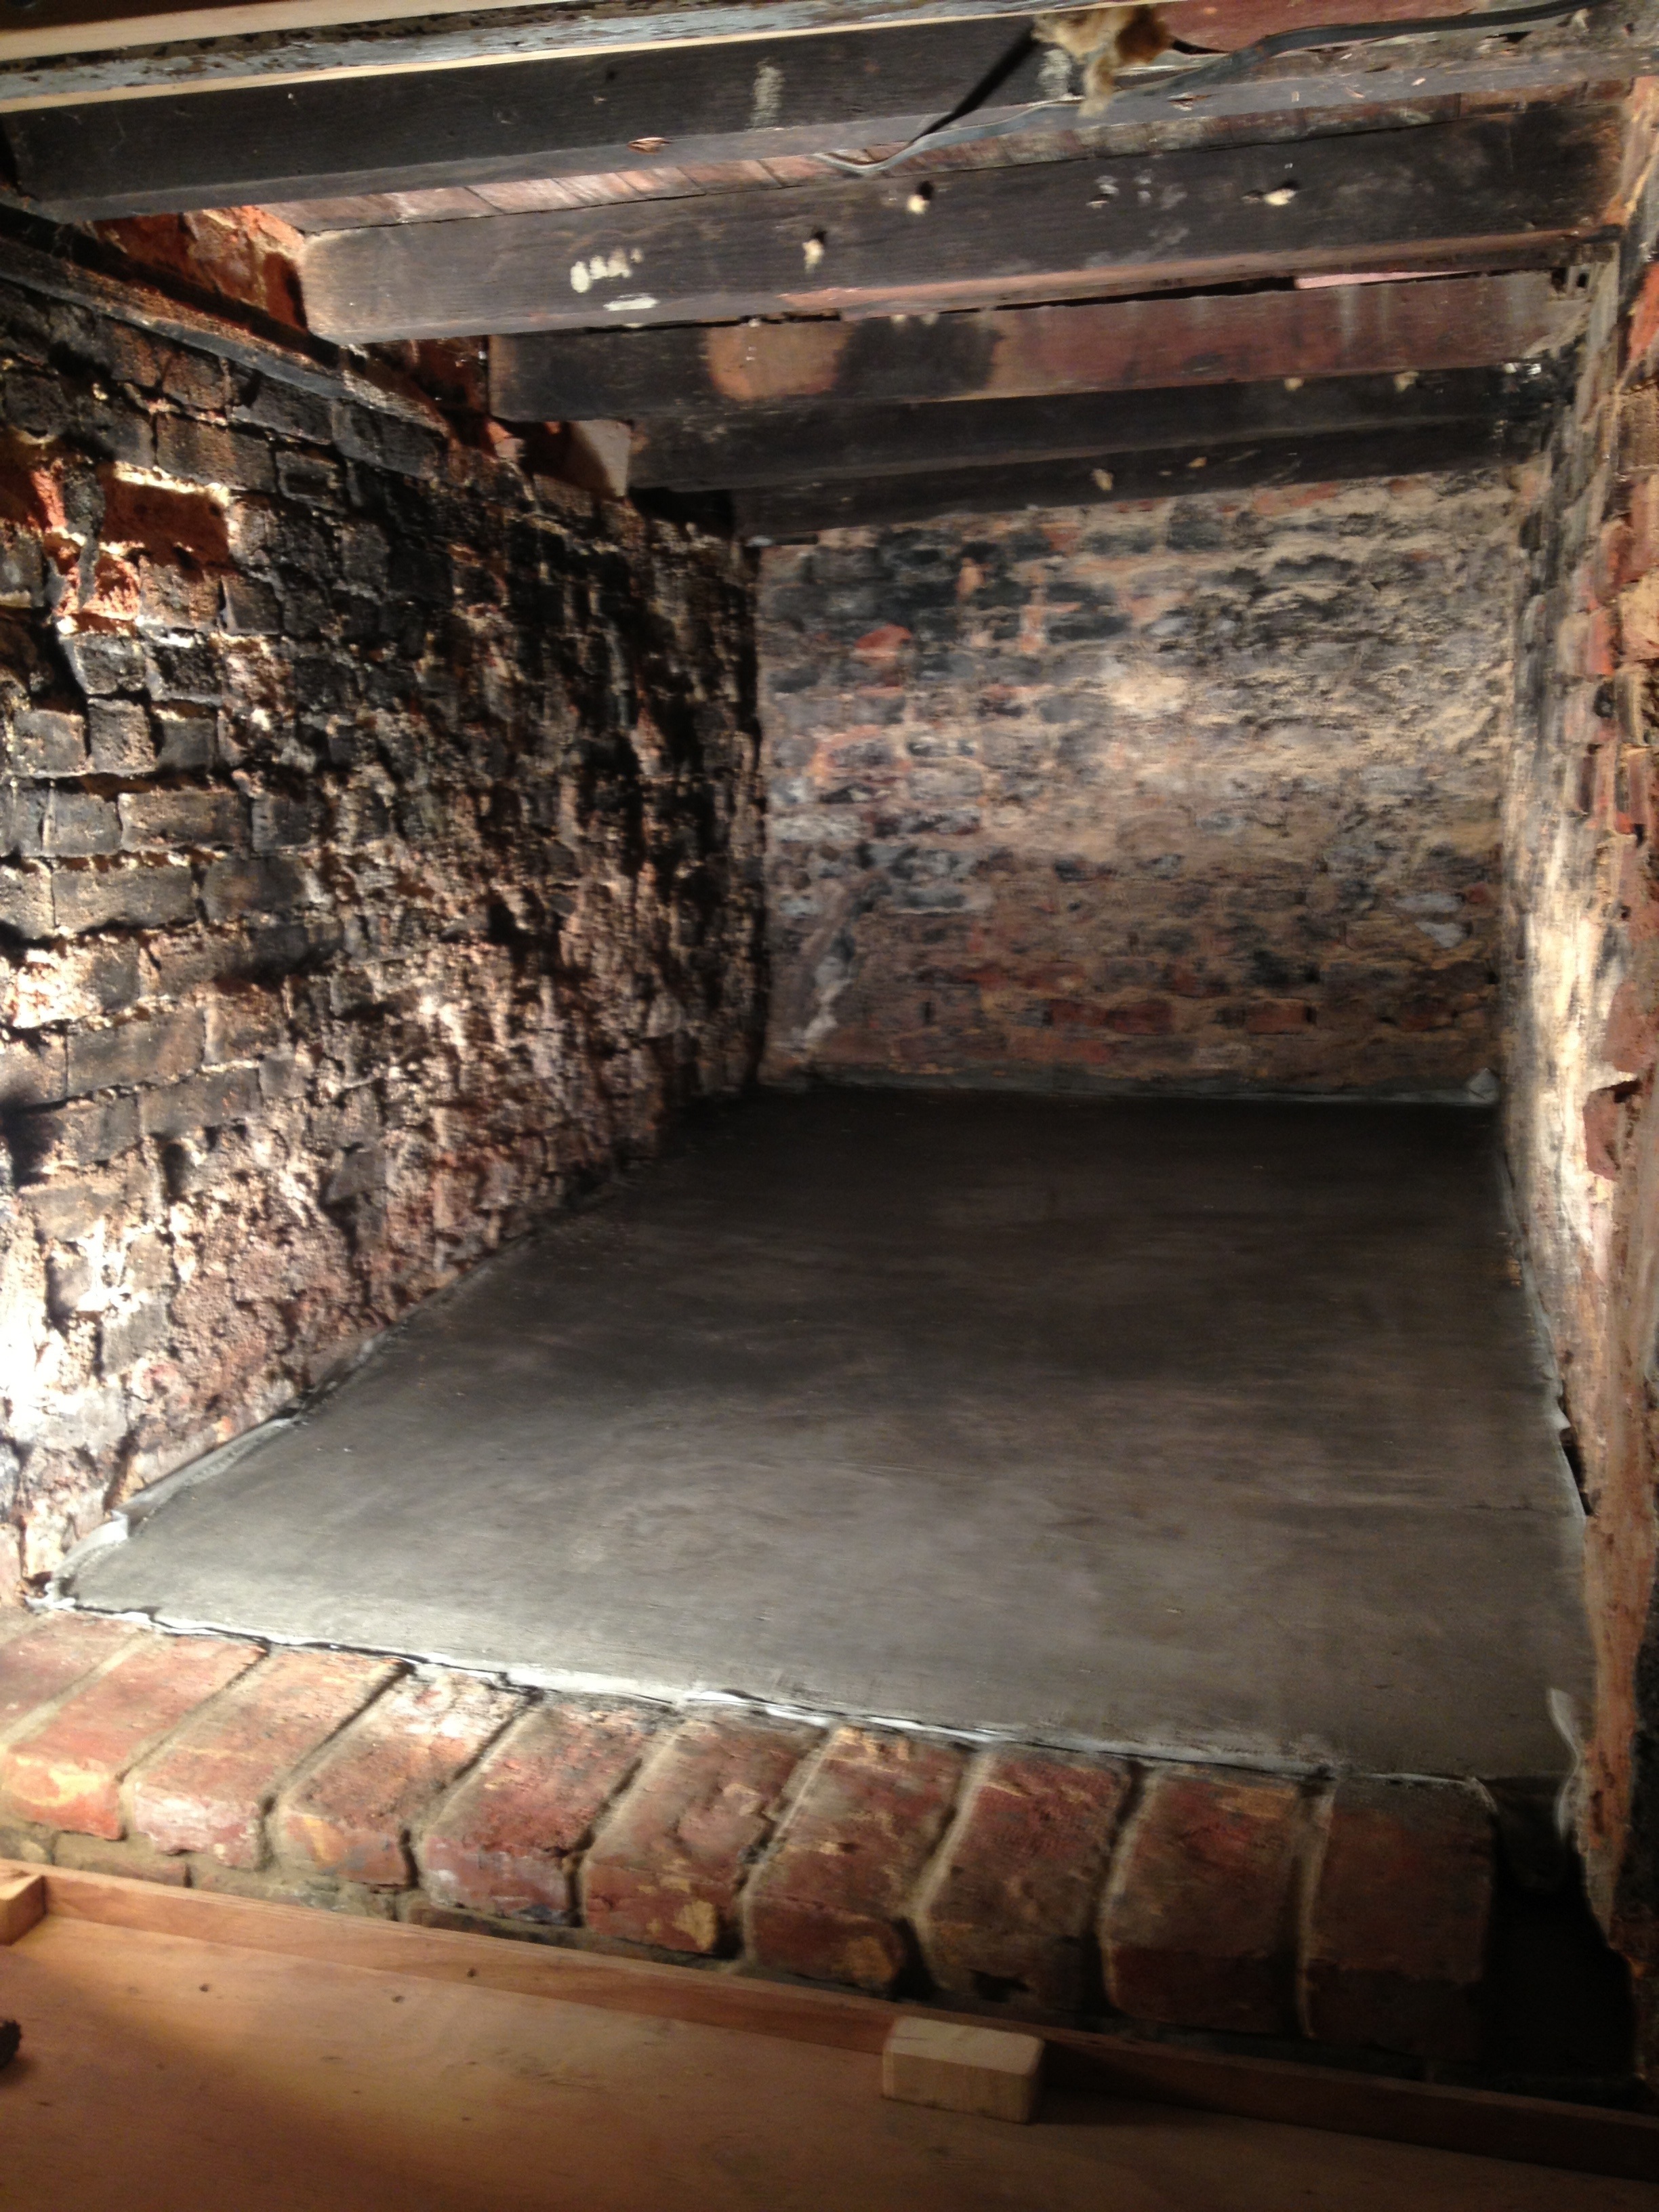
Finished! Going to store some light boxes on it and let it cure for a month before I get to work on those awful bricks.
I’ve already started to store boxes in there. I’ll let it cure for a month before I get to work on those awful coal dust coated bricks and joists.